Anyone else here integrate a 3d printer into their reloading / shooting experience? I have been using a 3d printer for the last 4 or so years, and once I got into reloading and shooting I have found it to be REALLY awesome in this space. I have created many files so far, and wondering if anyone who is using a 3d printer would be interested in any of these types of files for free. This is really an awesome time to get a 3d printer because the technology is getting really good, and it’s not too difficult to learn how to model your own custom parts.
Also this post is to also inspire any of you who may be on the fence about 3d printers. I have found it amazing for ALOT of uses. Not just gun stuff. This is a tool for me.
3d parts are obviously alot more flexible, and brittle than metal parts, but in certain use cases it can’t be beat.
I am planning on updating the post if I can to include pictures. There may be other items I have modeled, but forgot to include.
Reloading:
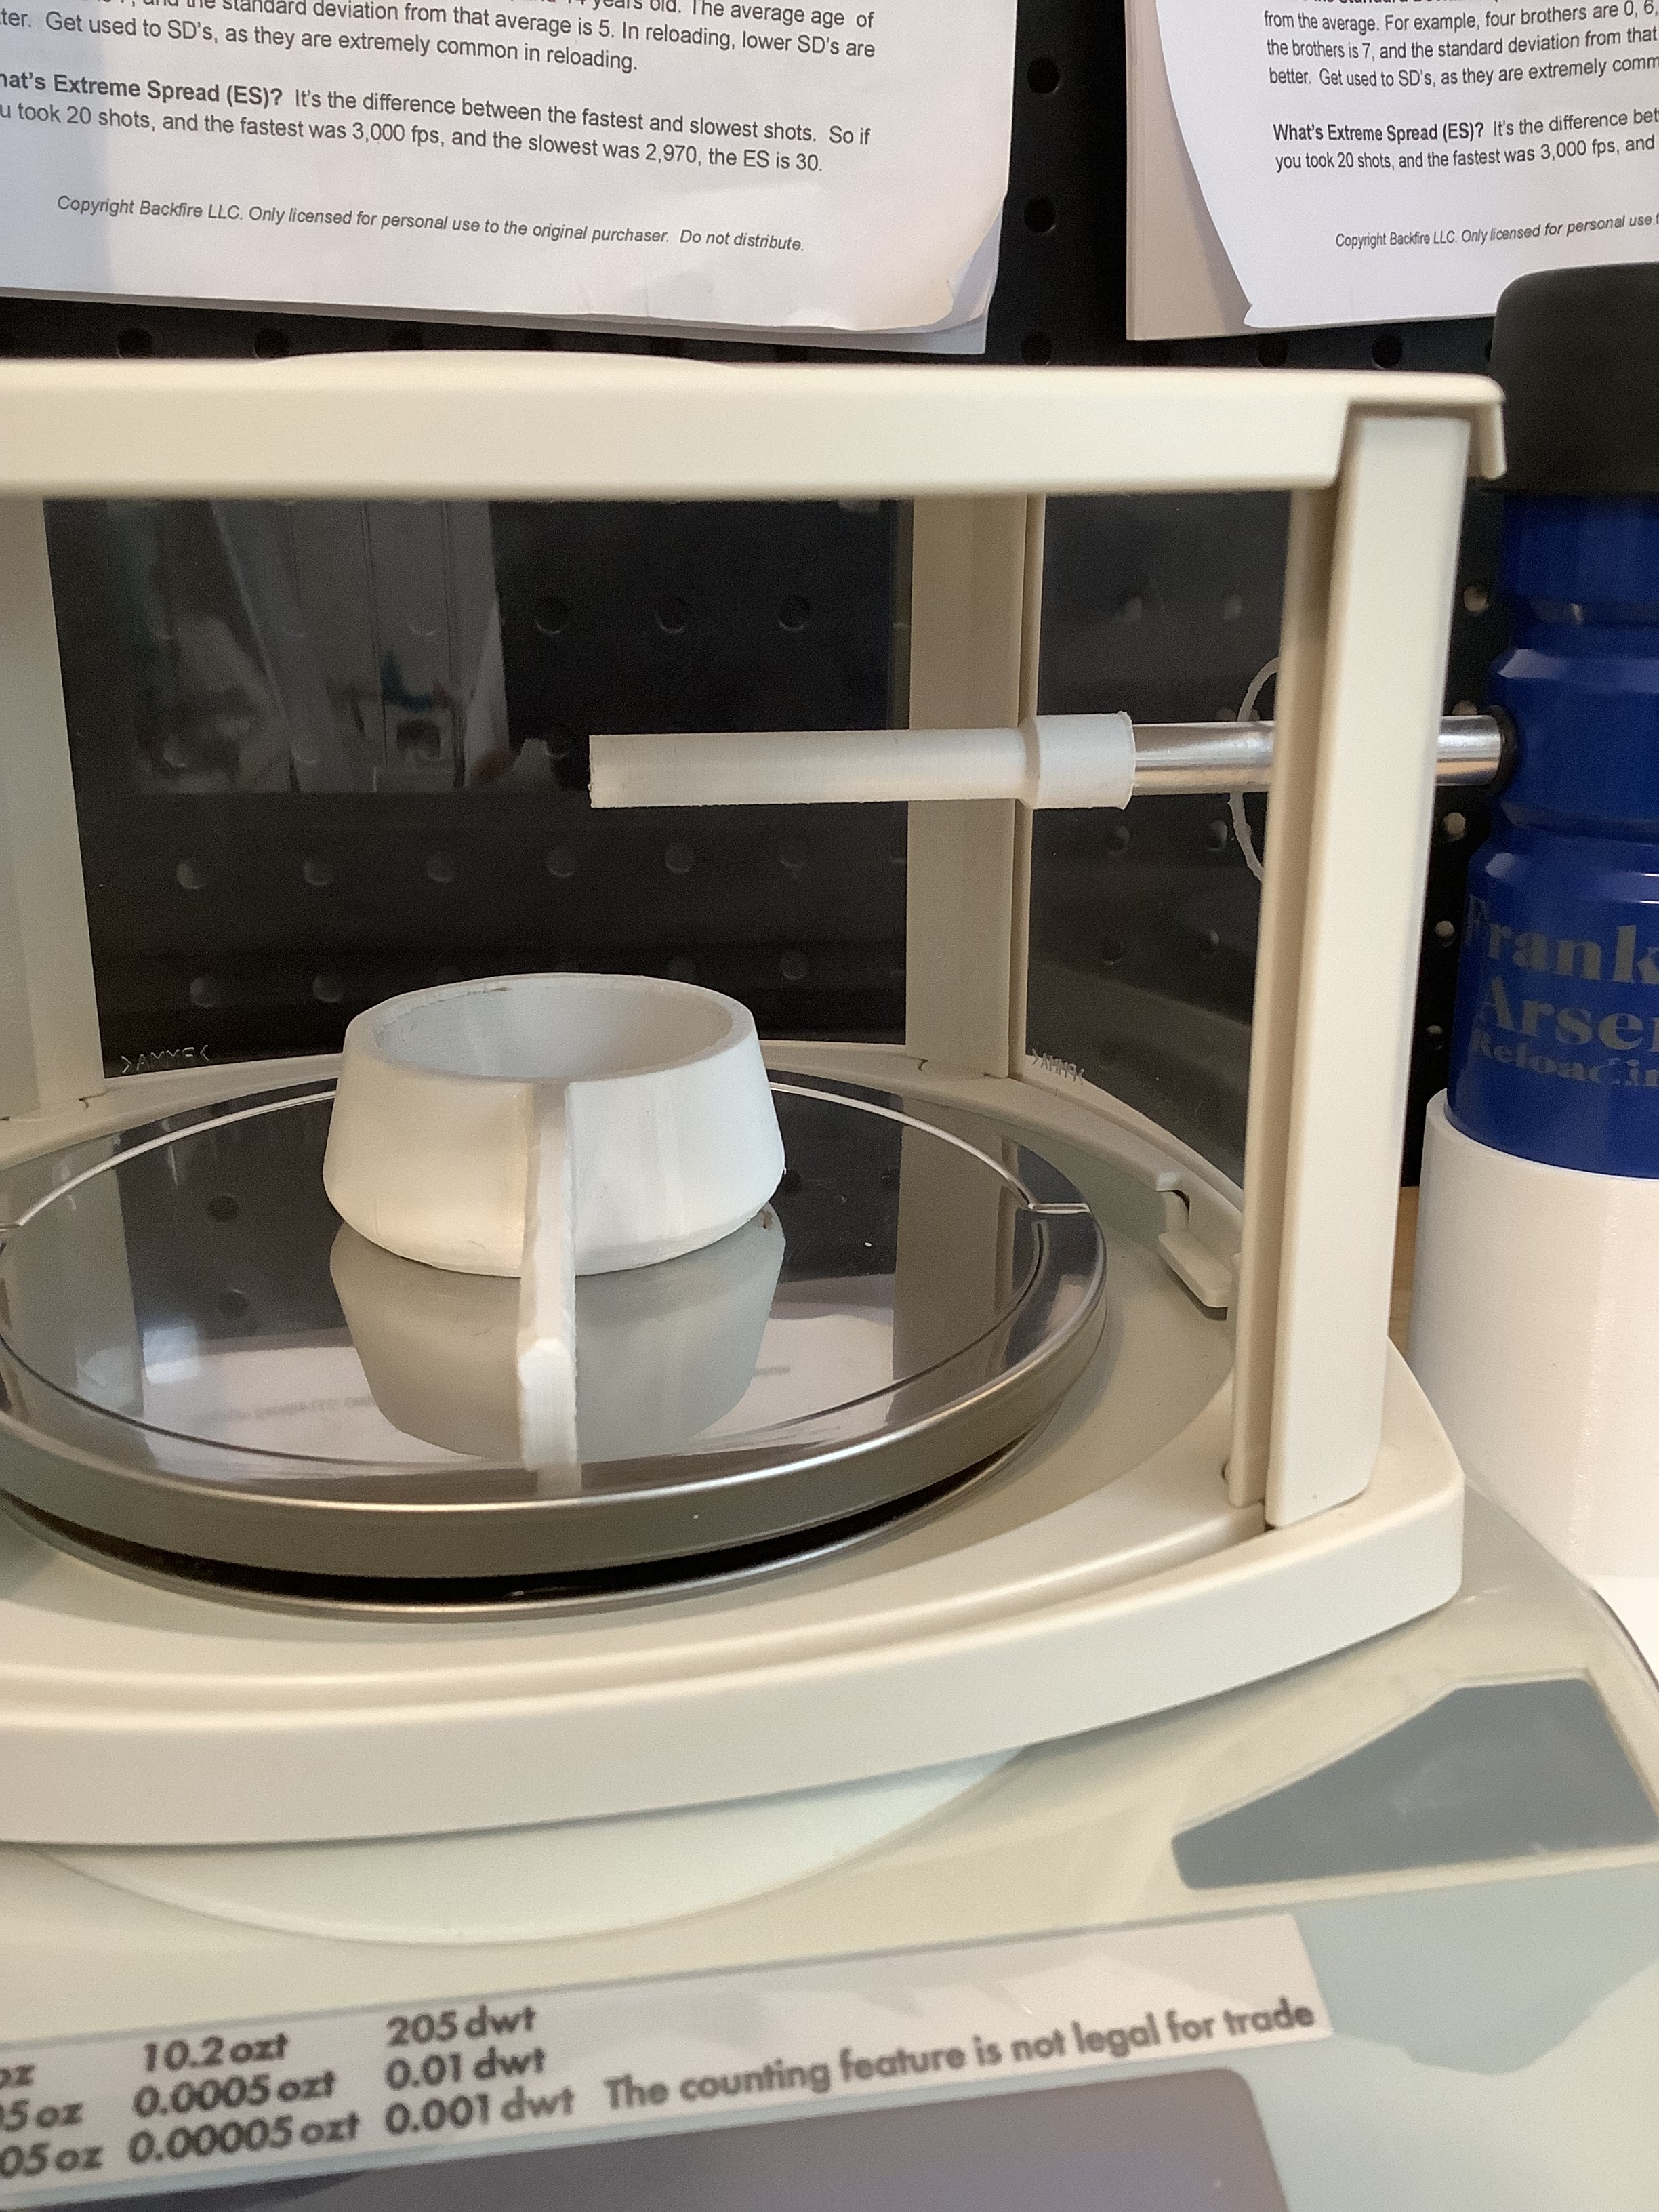
Powder Cup - This one is awesome, because I have created a few and shaved off what I needed to make them exactly the same weight to a hundredth of a grain. I can rotate these between the powder dispenser (cheap lymann), and my A&D scale.
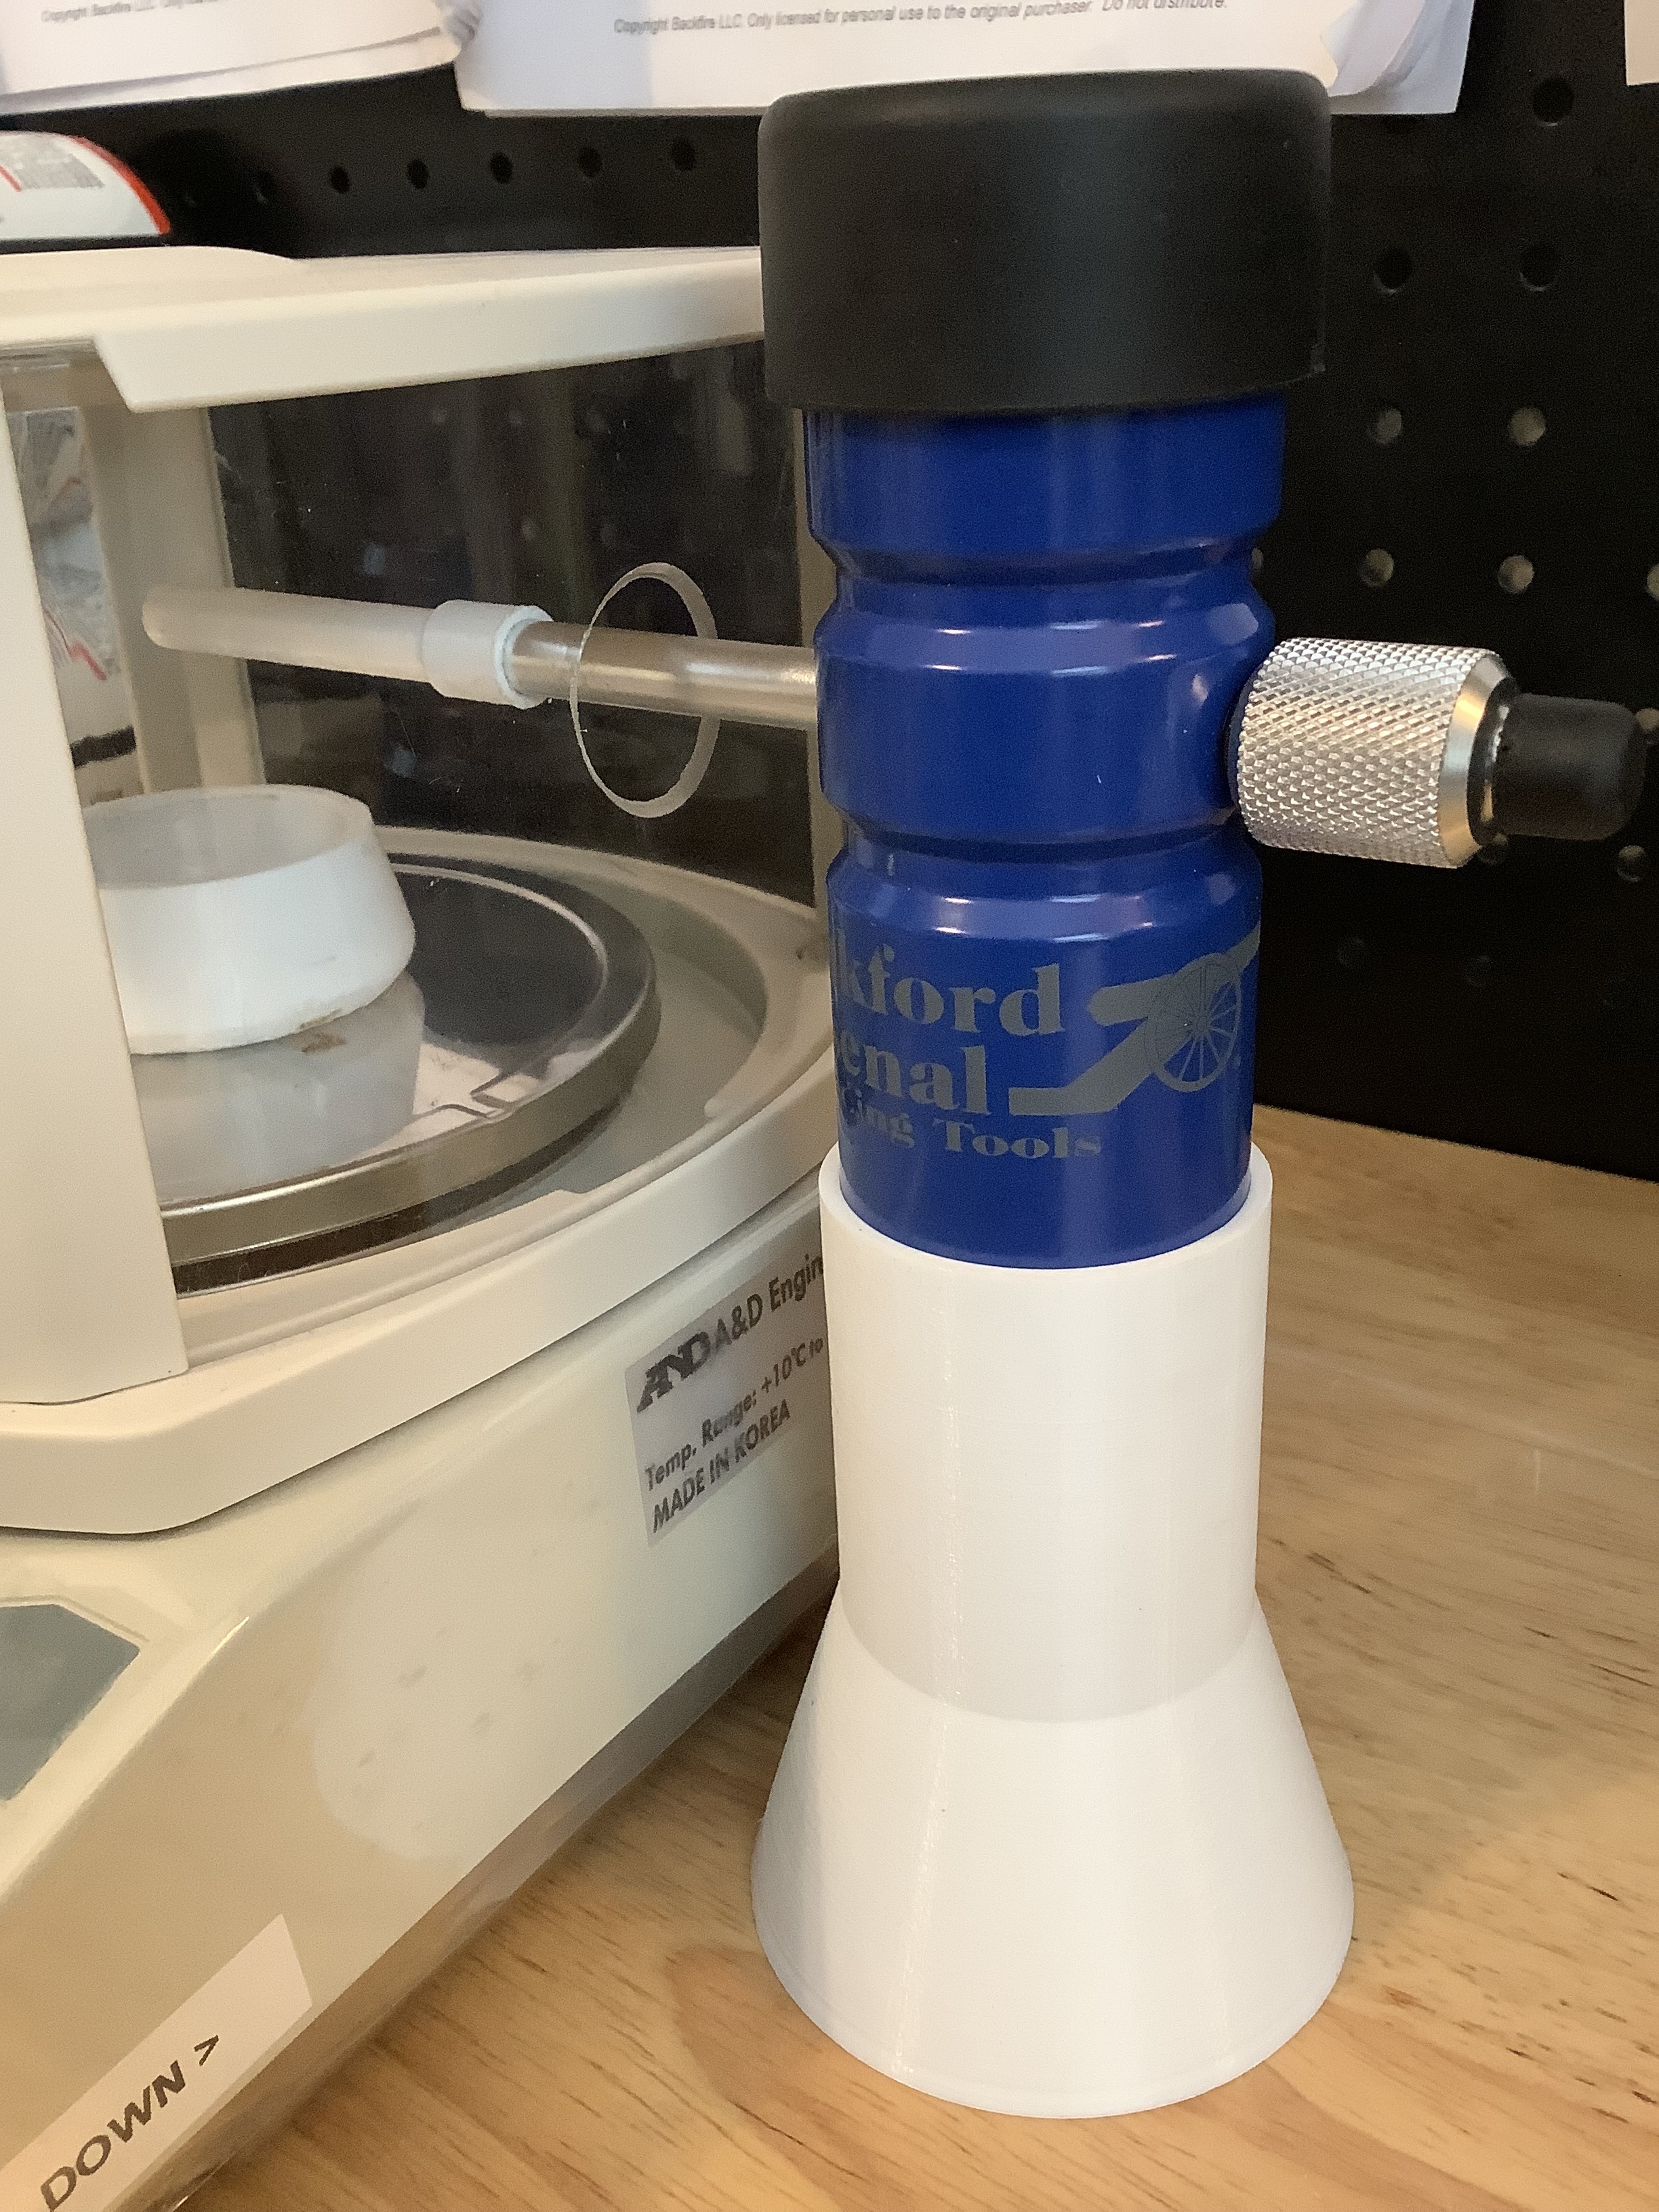
Powder Trickler Stand - This is for the blue hand powered Frankford Arsenal powder trickler. It gets it up high enough for me to trickle directly into my A&D scale.
Powder Trickler Extension Tube - This one also fits on the FA trickler as an extension tube. I needed an extension tube so that I could position the drop of the powder directly over my powder cup. (drilled a hole through the A&D shield)
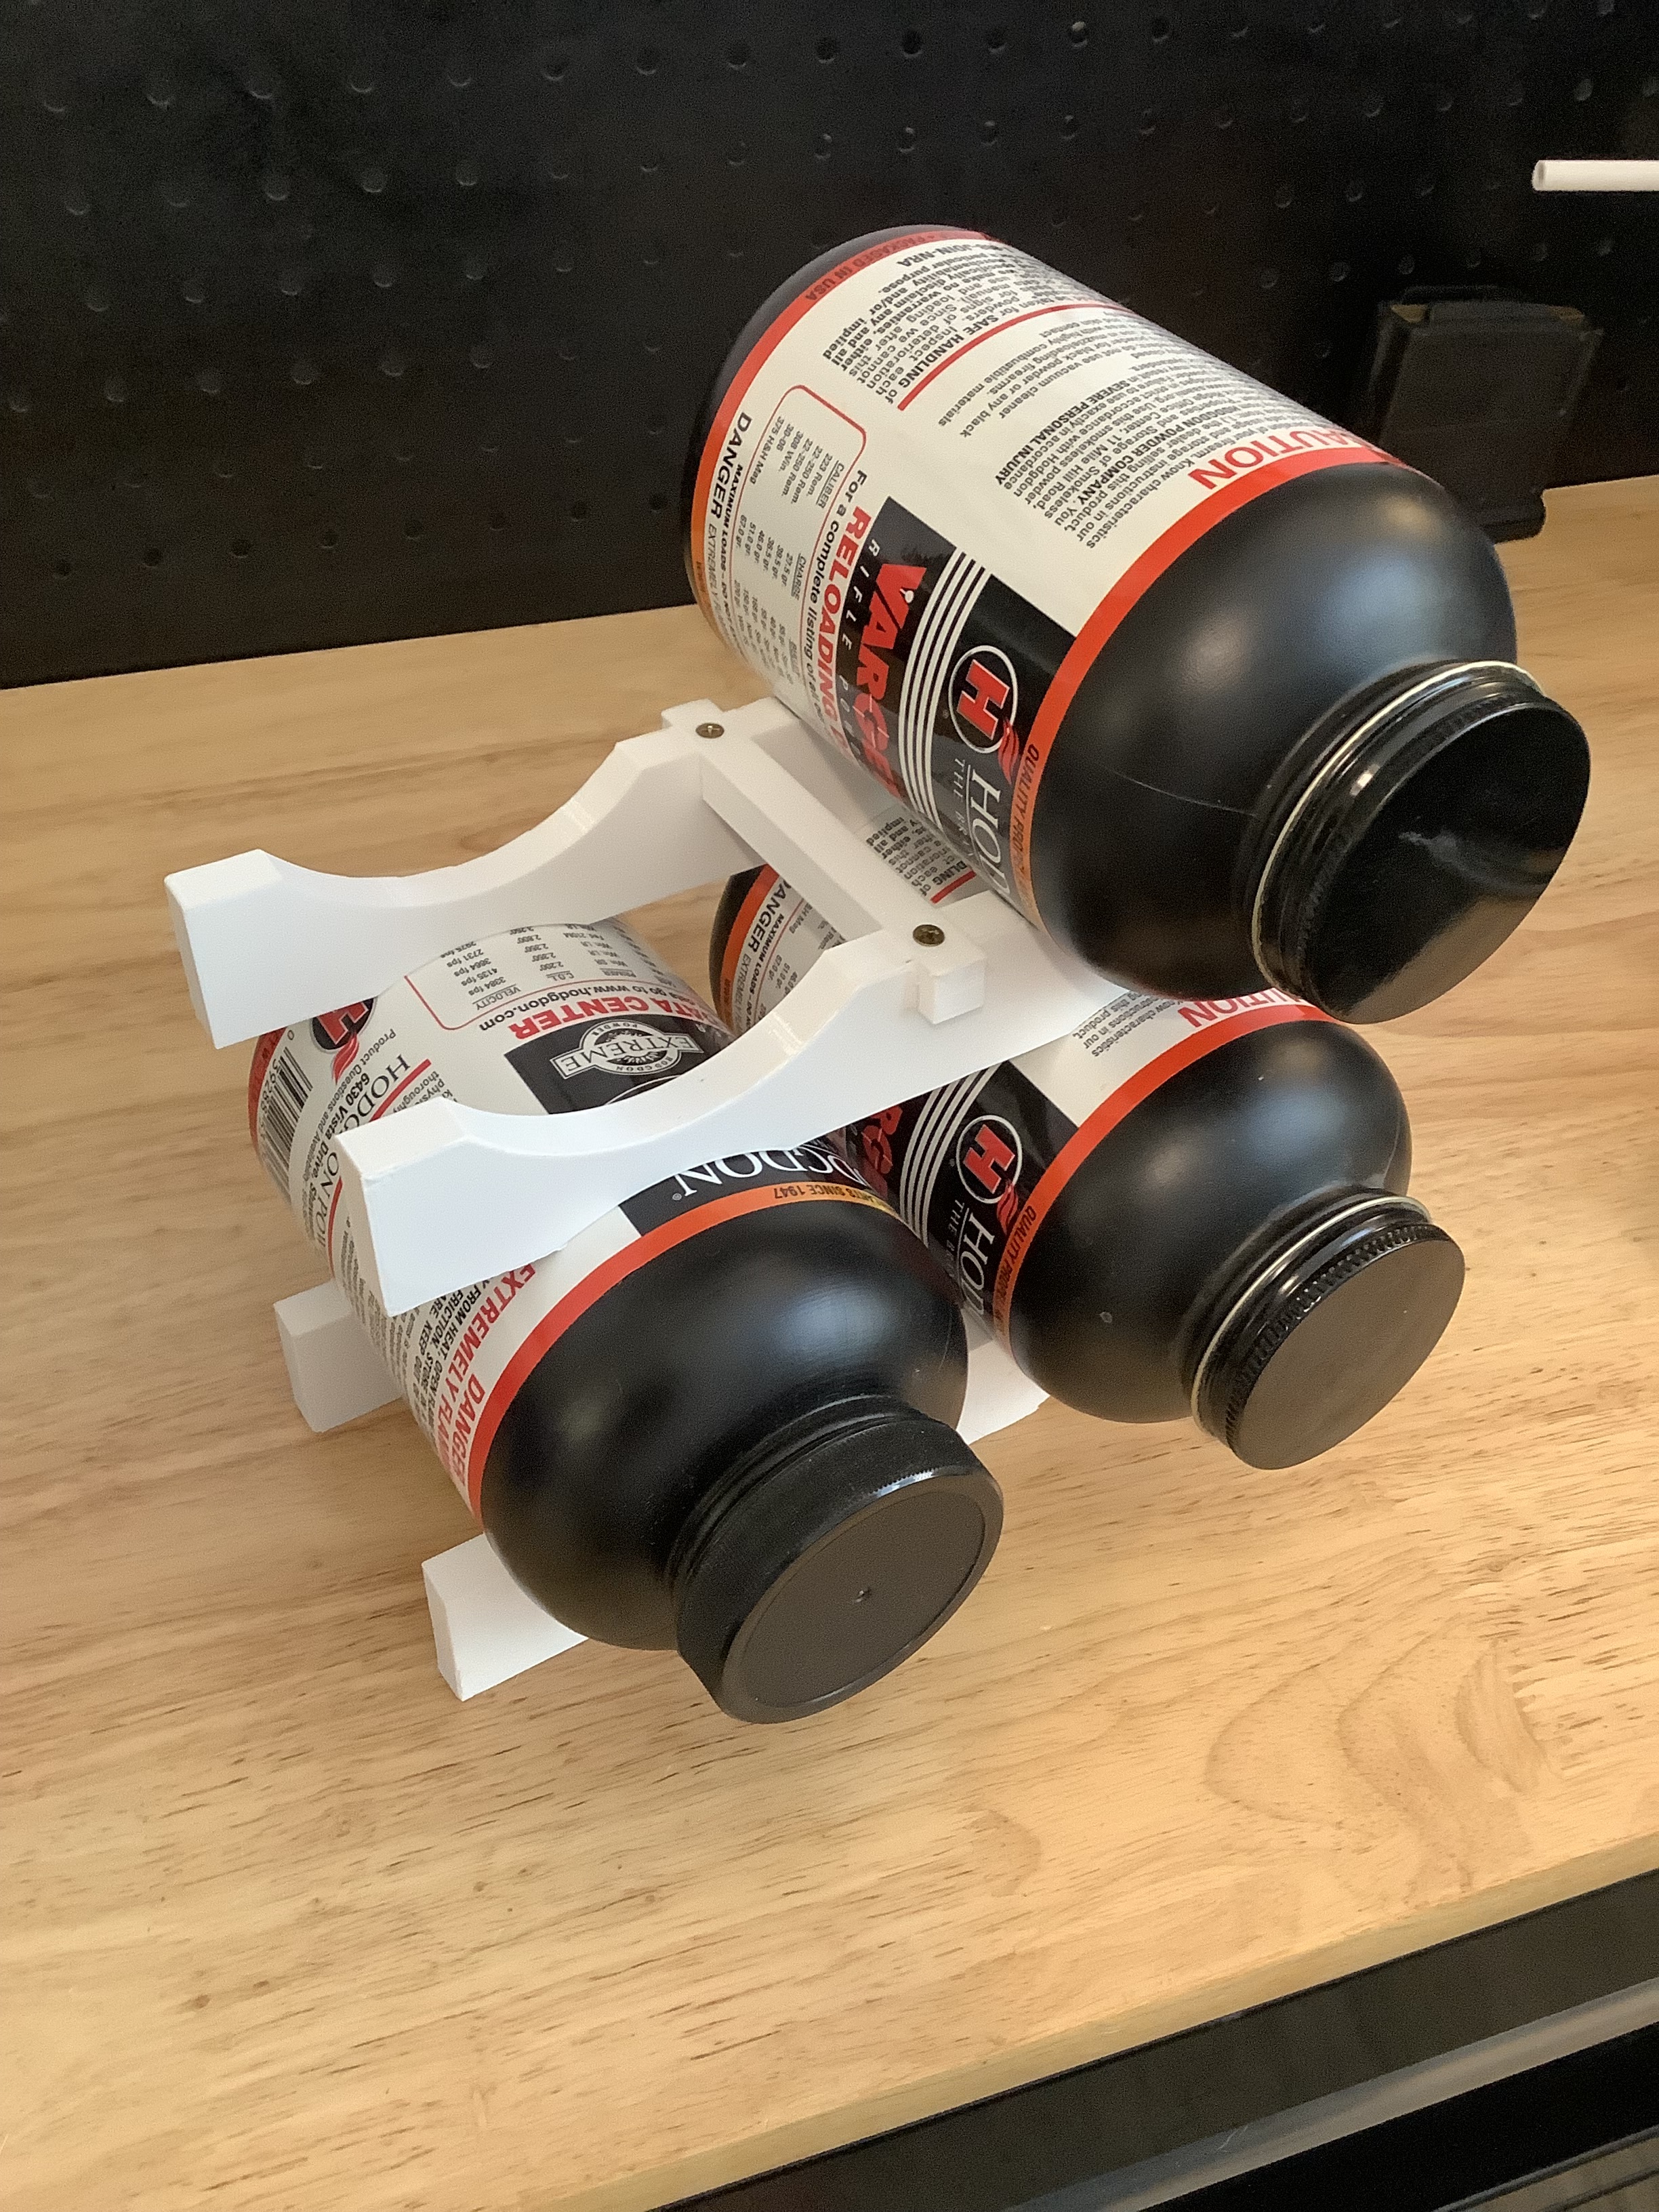
1LB Stackable Powder Stand - This one gives me the ability to stack 1lb Powder Cans
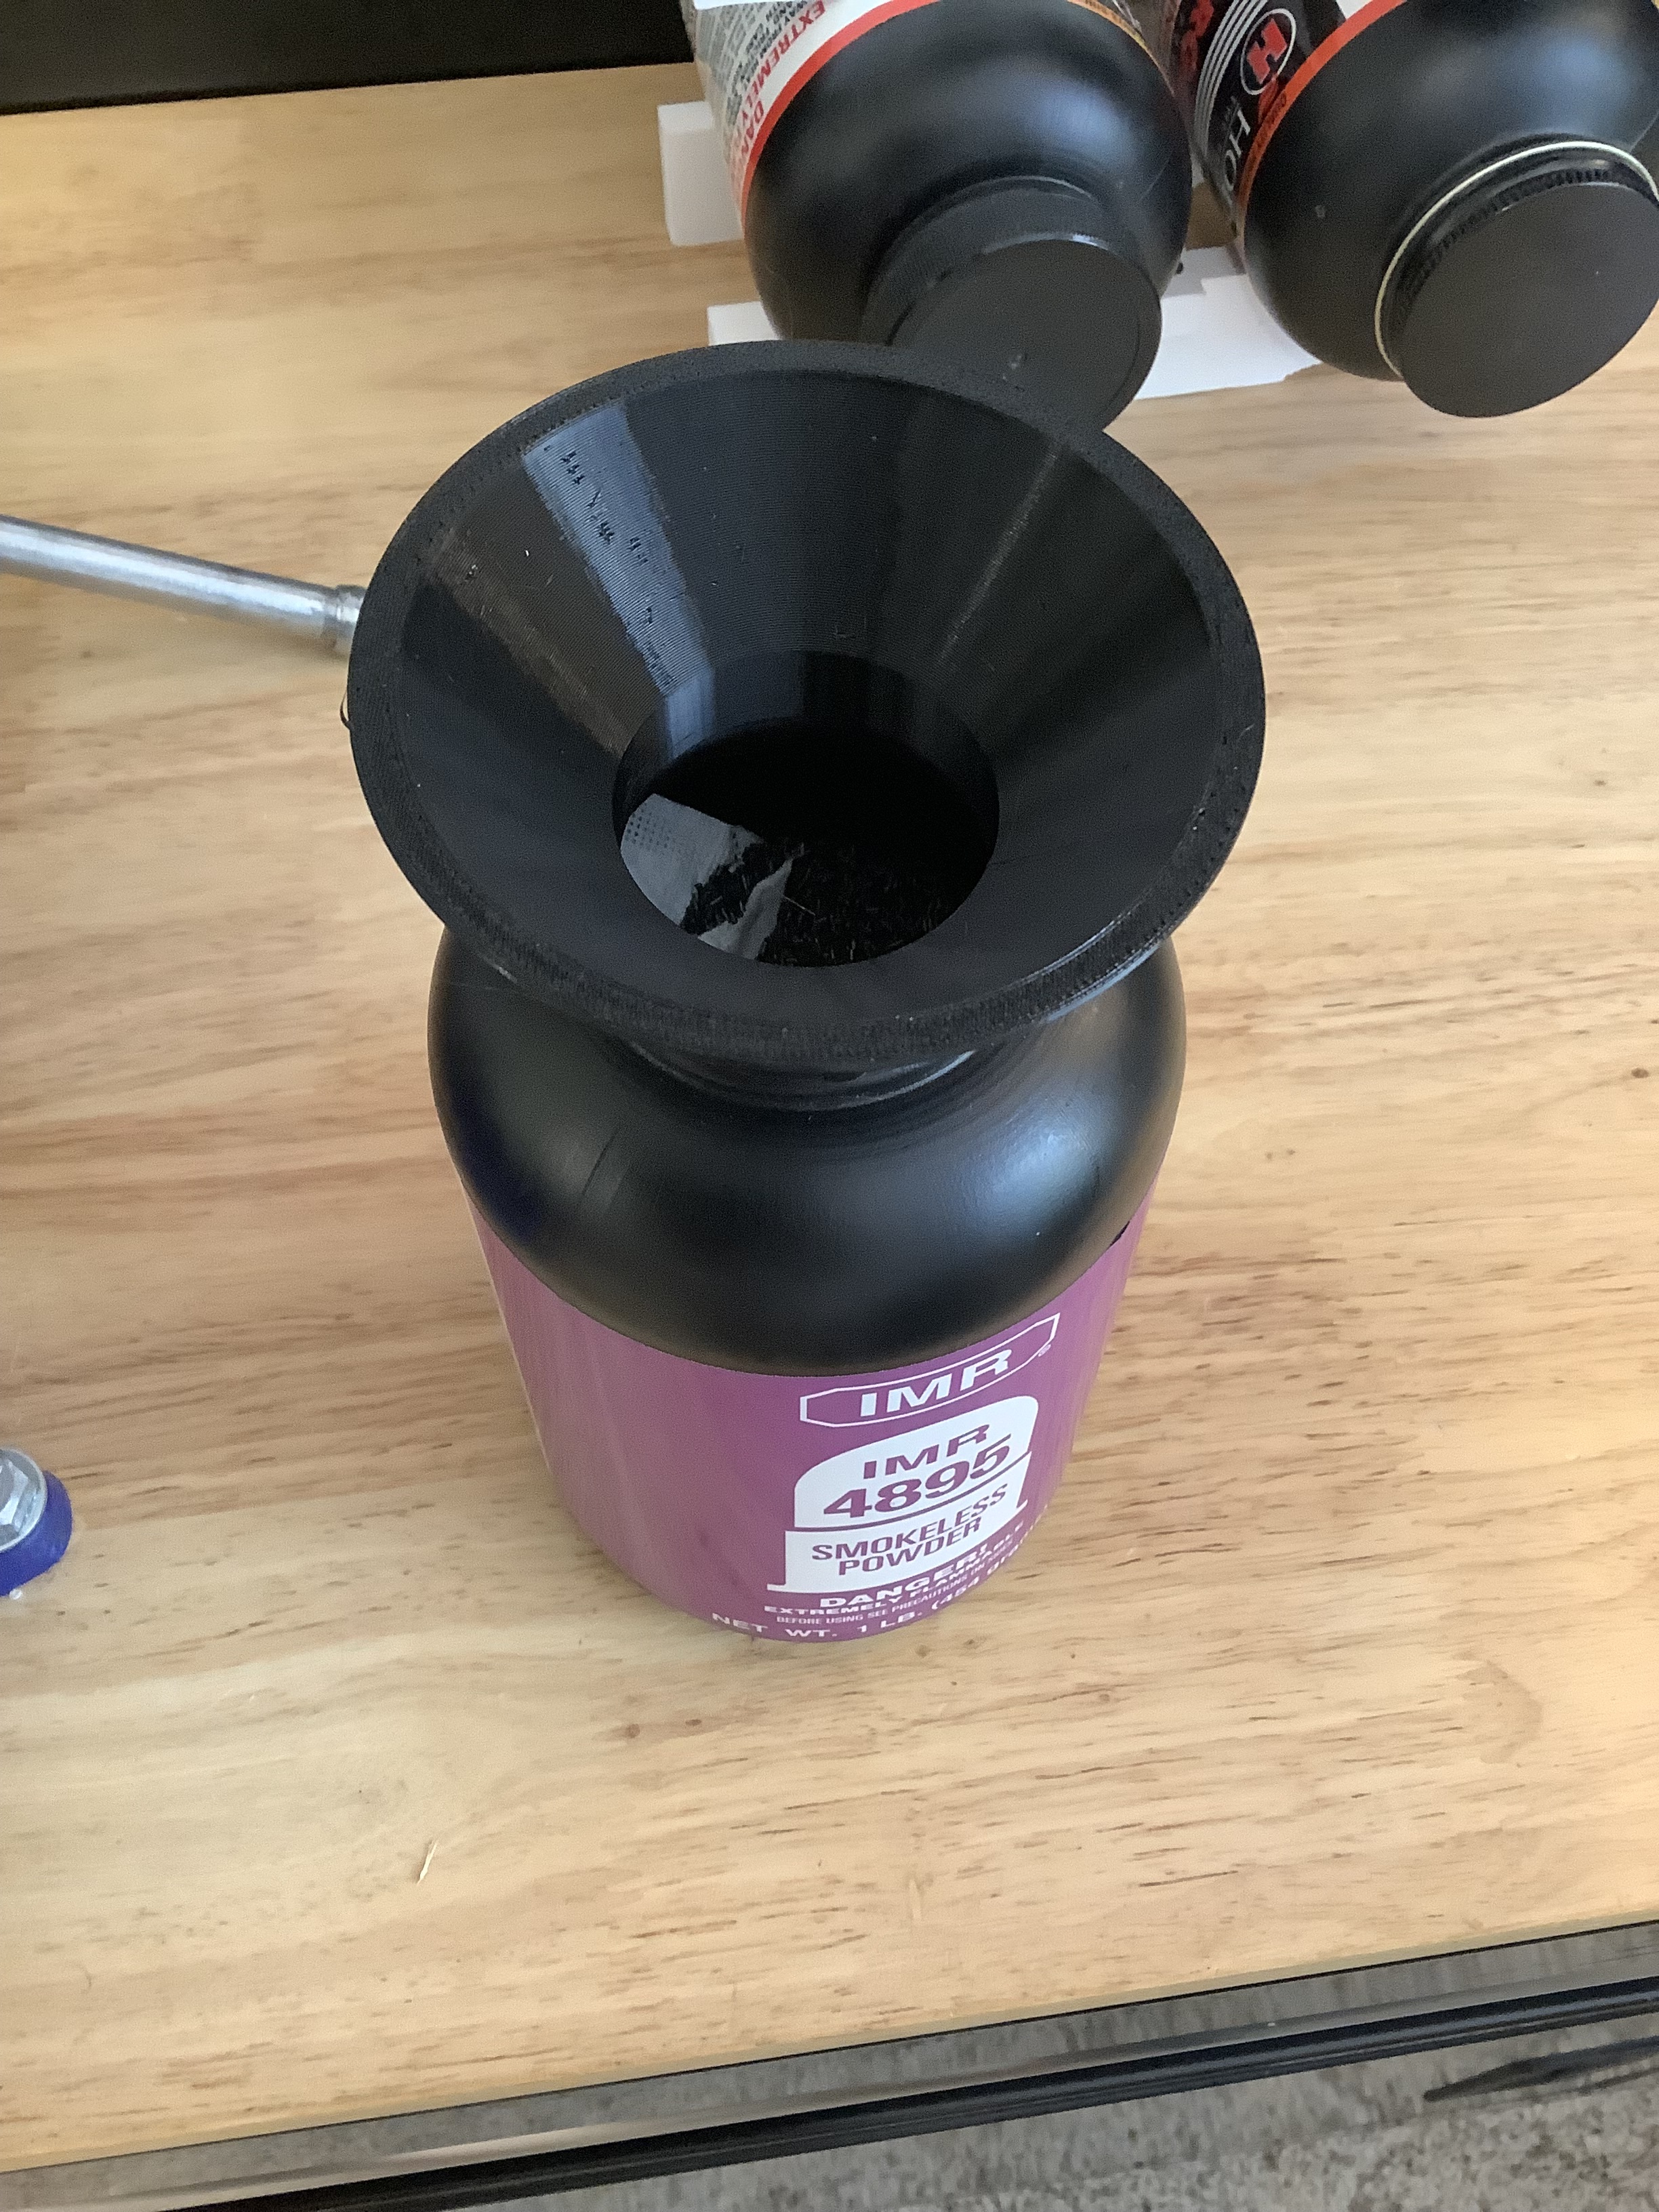
1LB Powder Funnel - This perfectly fits inside the mouth of a 1lb can of powder and expands the mouth. This useful for filling from a 8lb jug, or putting the remainder of powder from a trickler without having to be super careful.
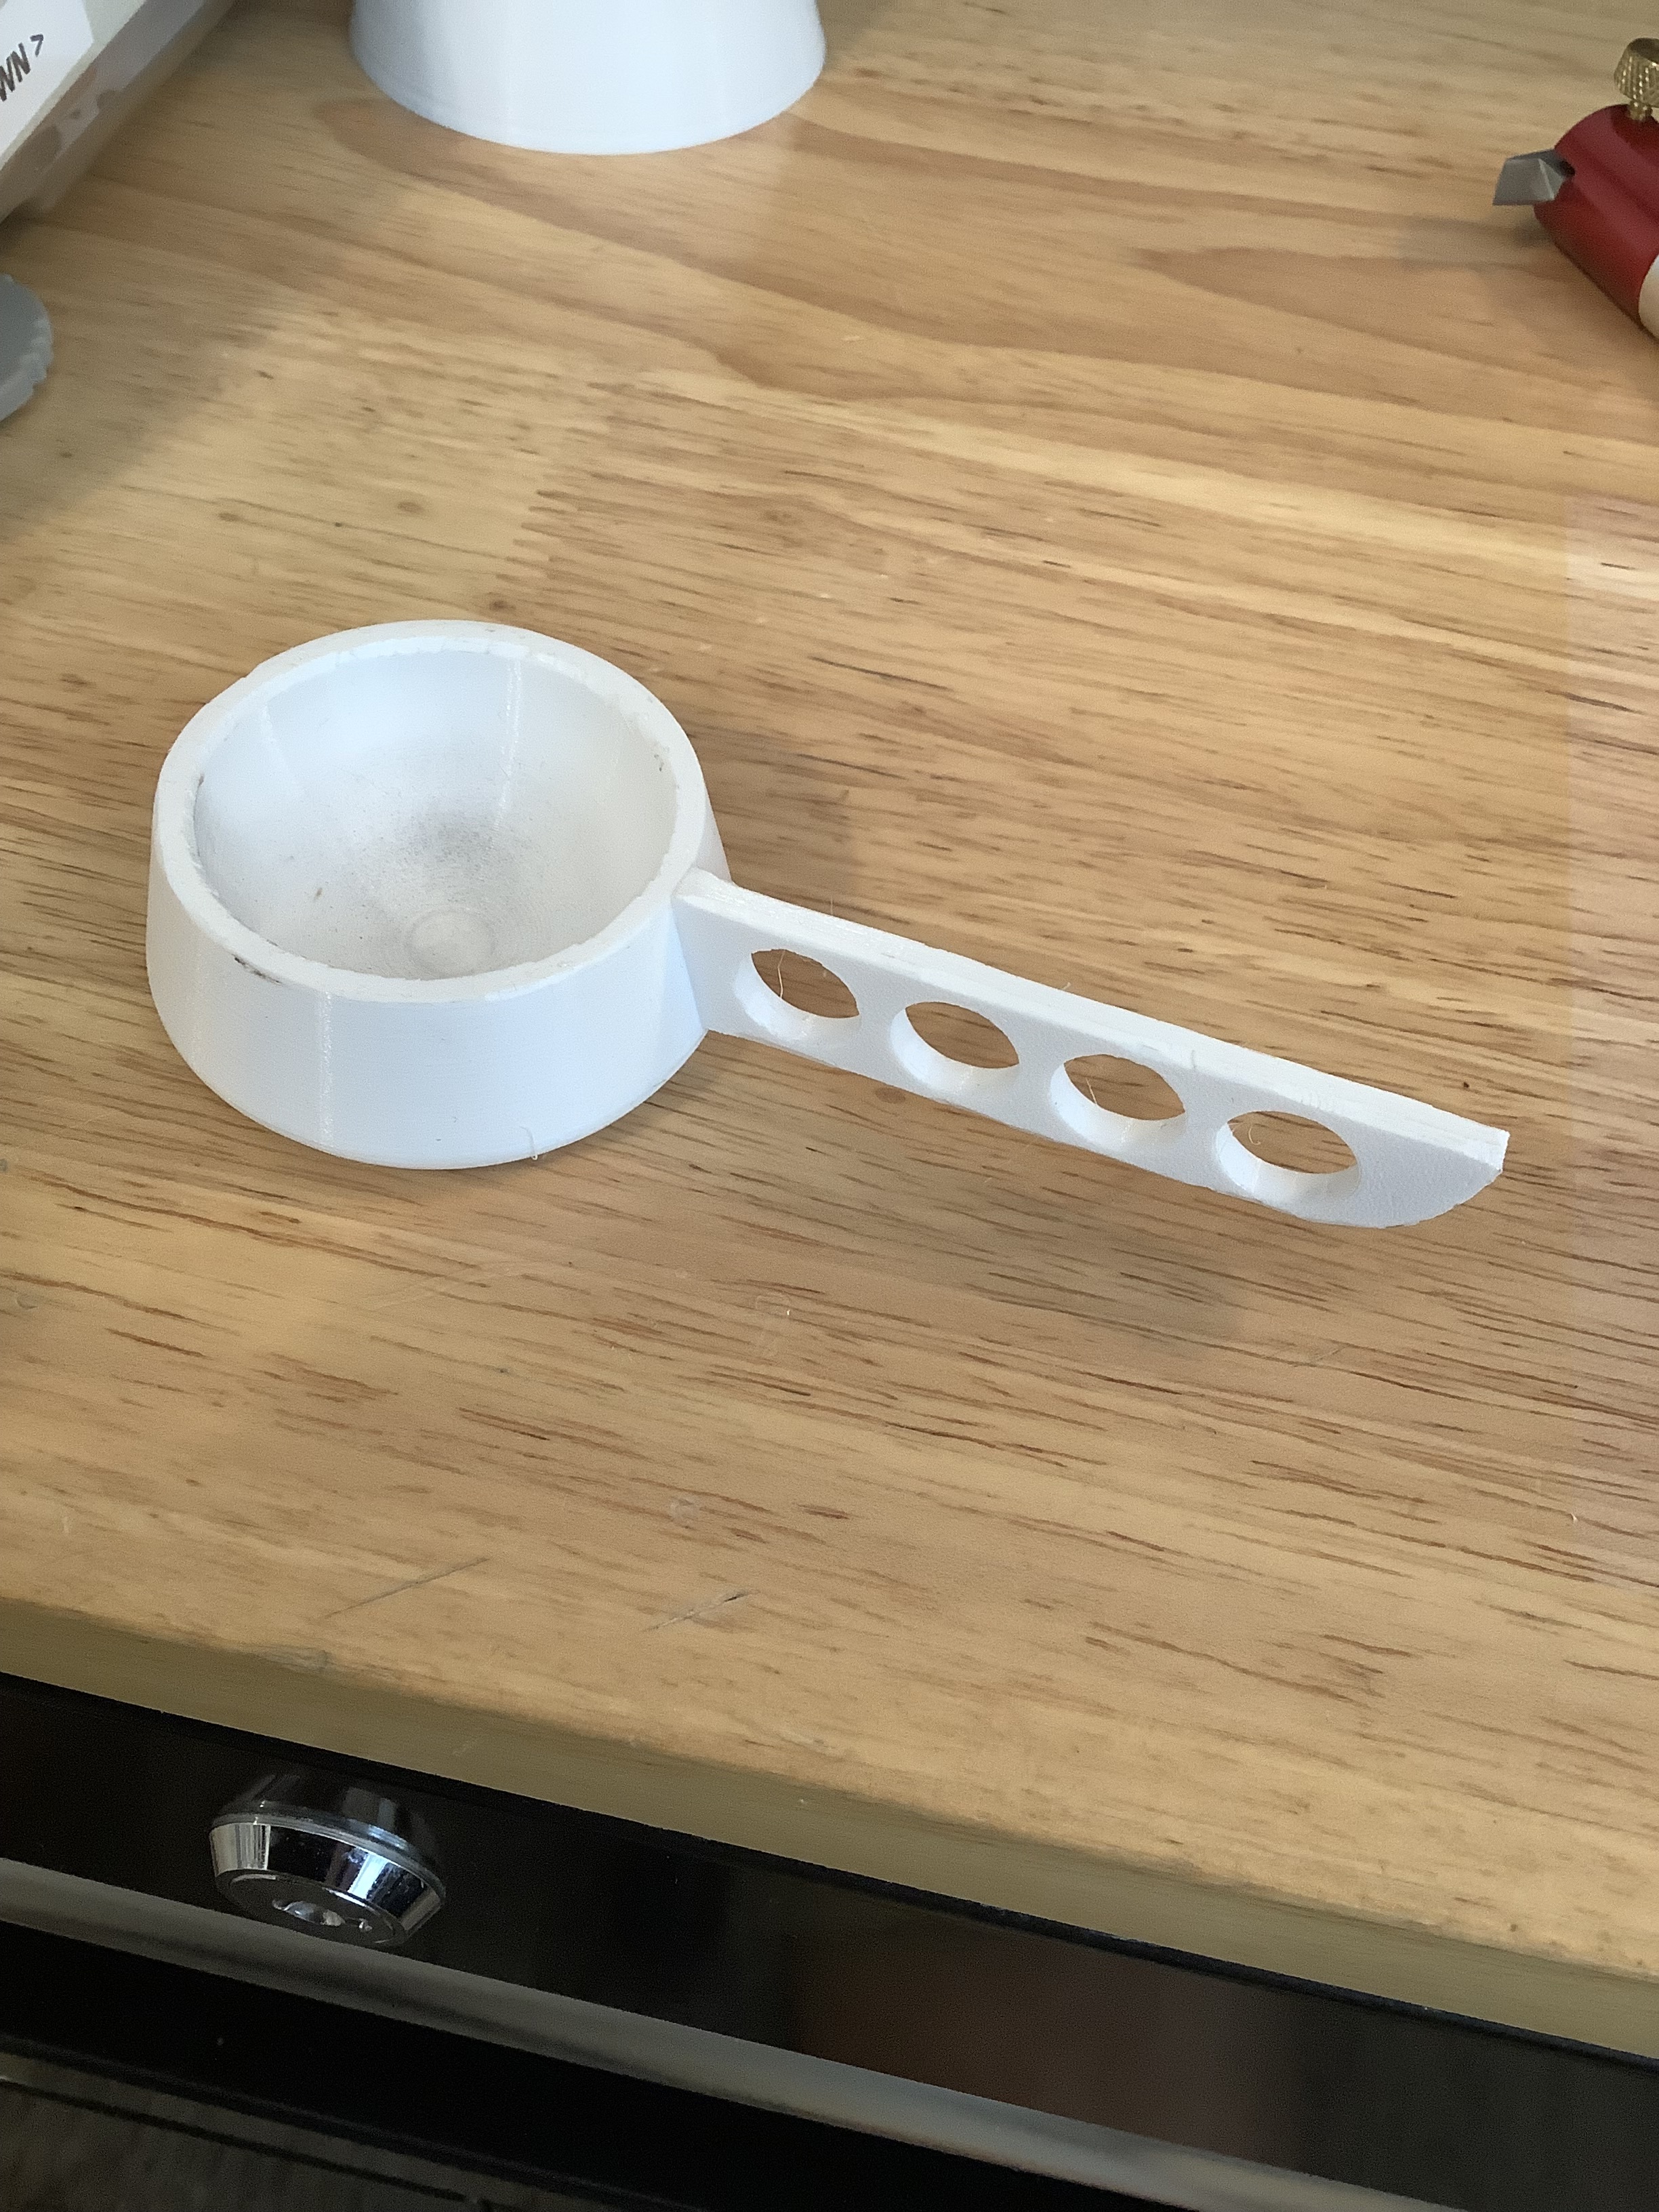
Case Caliper Base - This is very similar to Hornady comparitor base. I modeled it to fit the Mitutoyo jaws perfectly.
Reloading Bench:
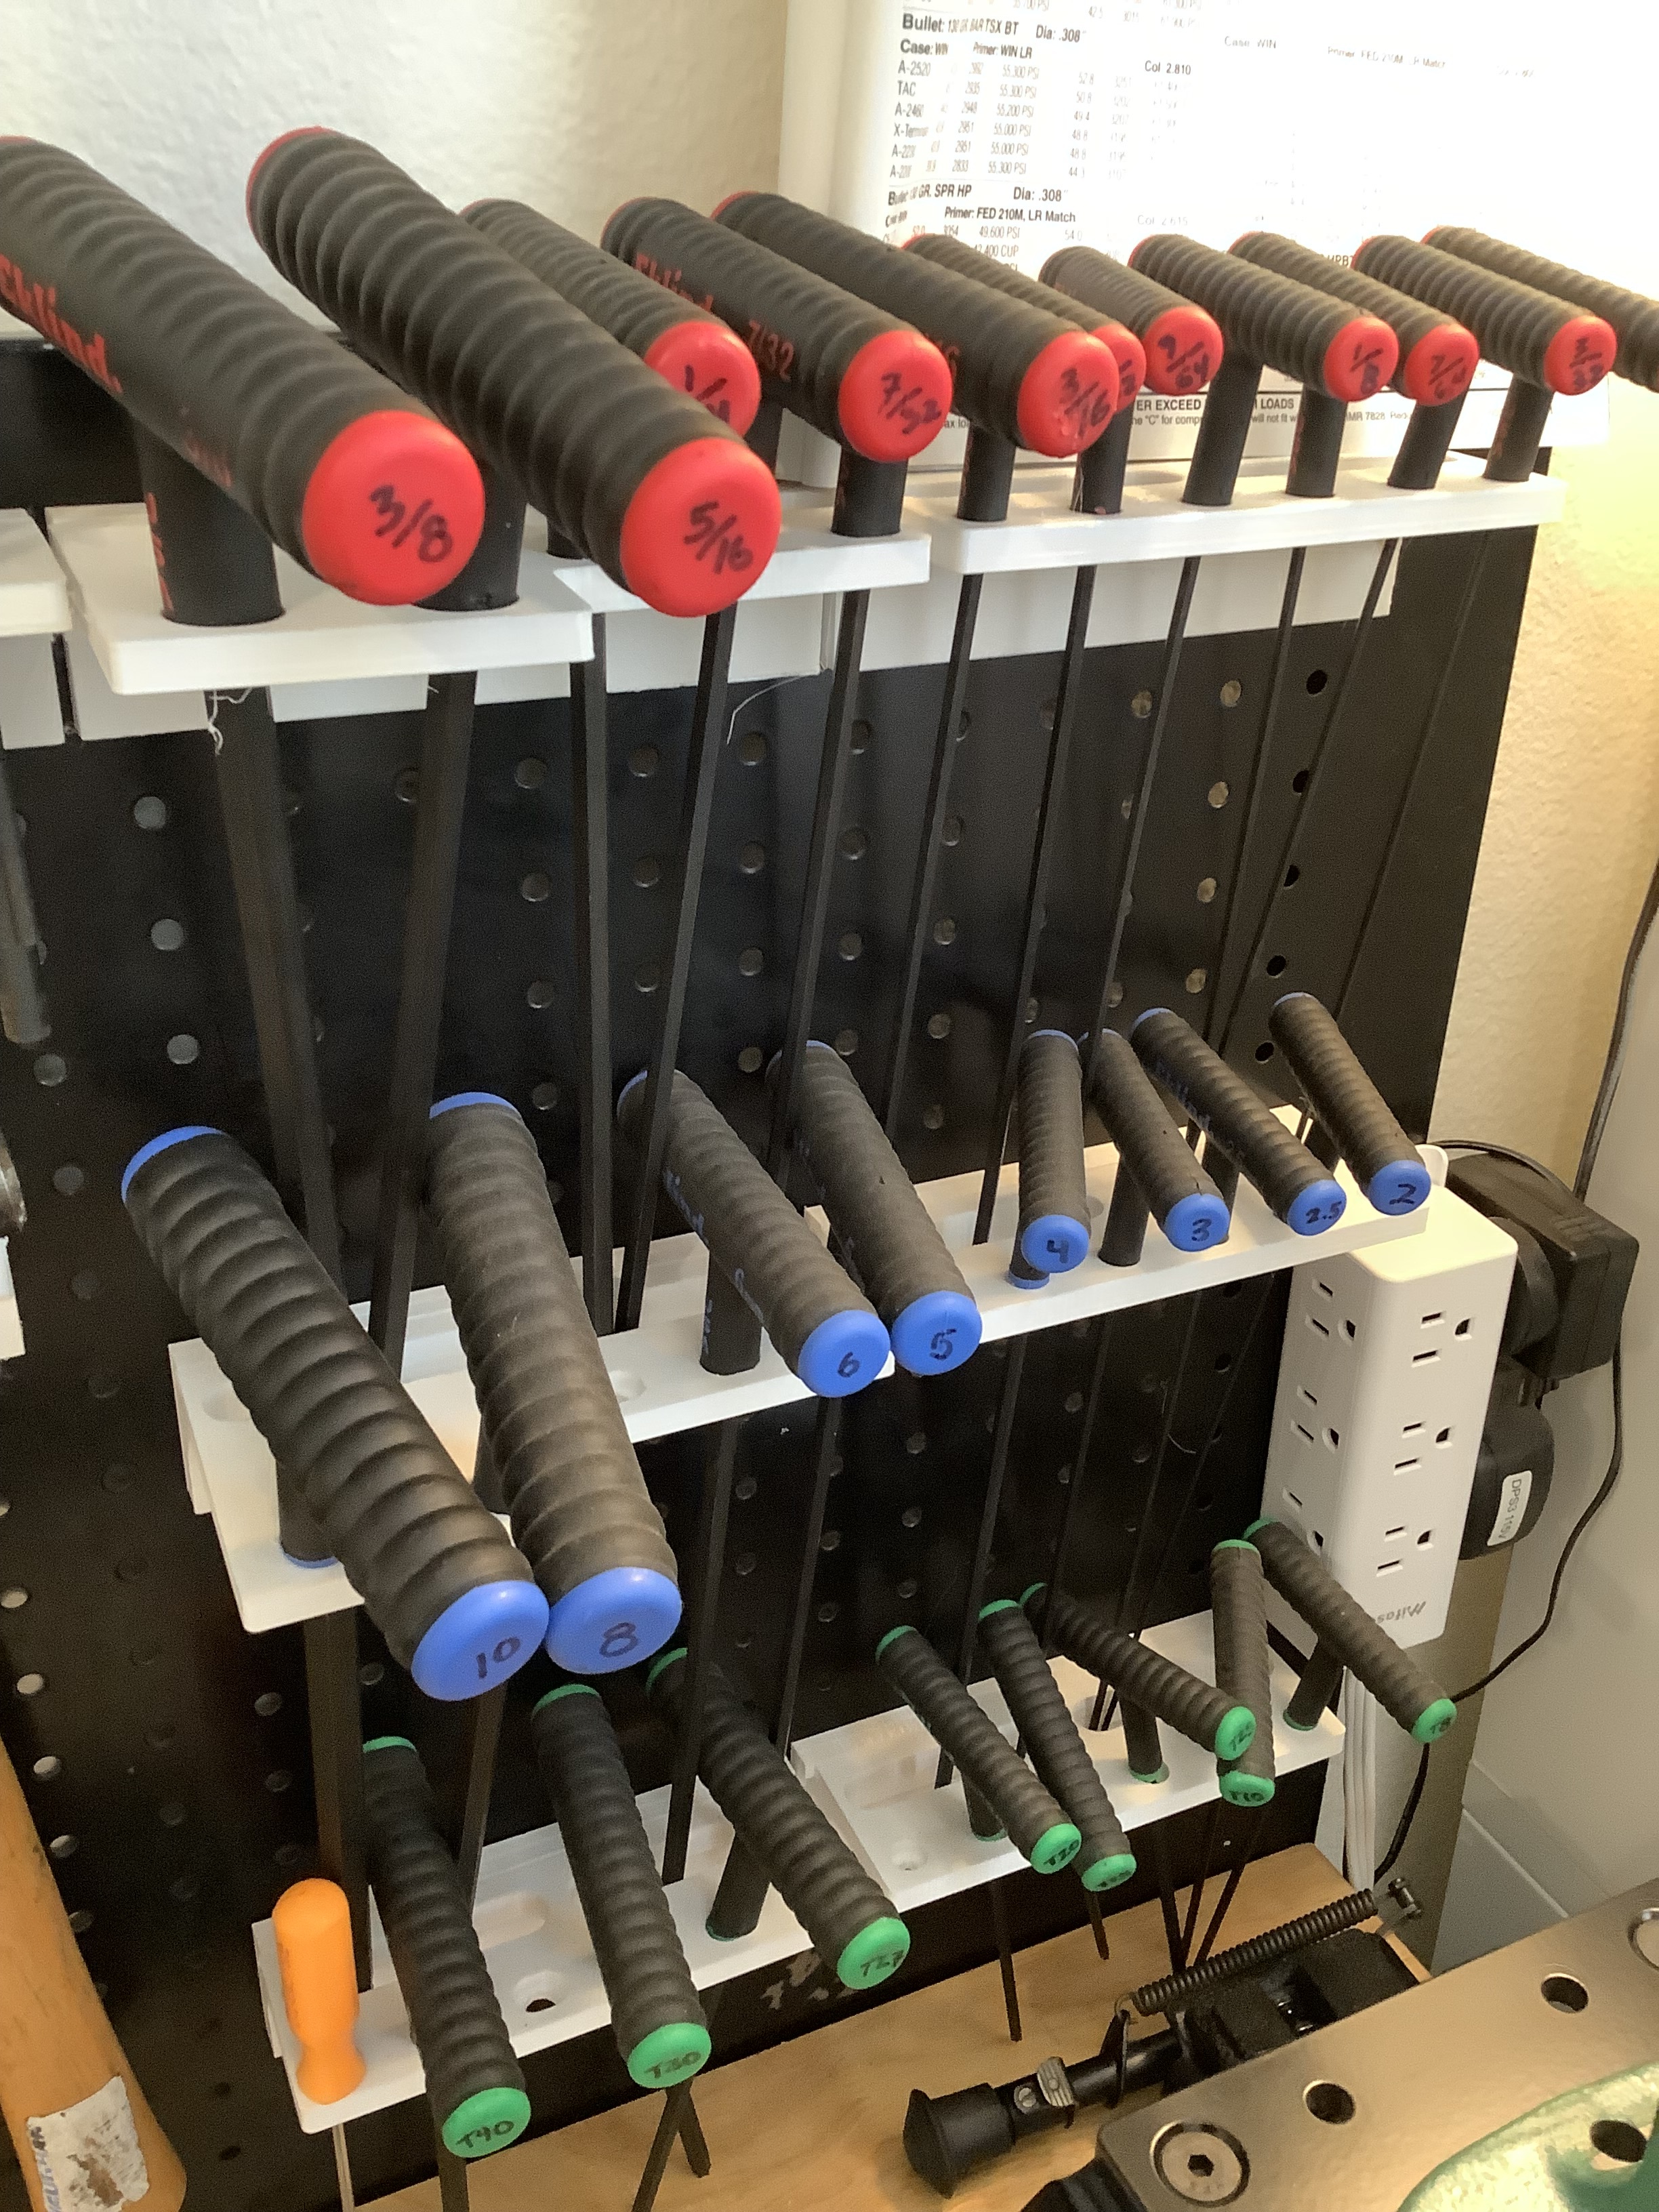
Eklind Alan Key Holders Peg (Metric, SAE and TORX) For Peg Board - This is for my bench pegboard, and has 8x3mm magnet holes in the back (my peg board is metal)
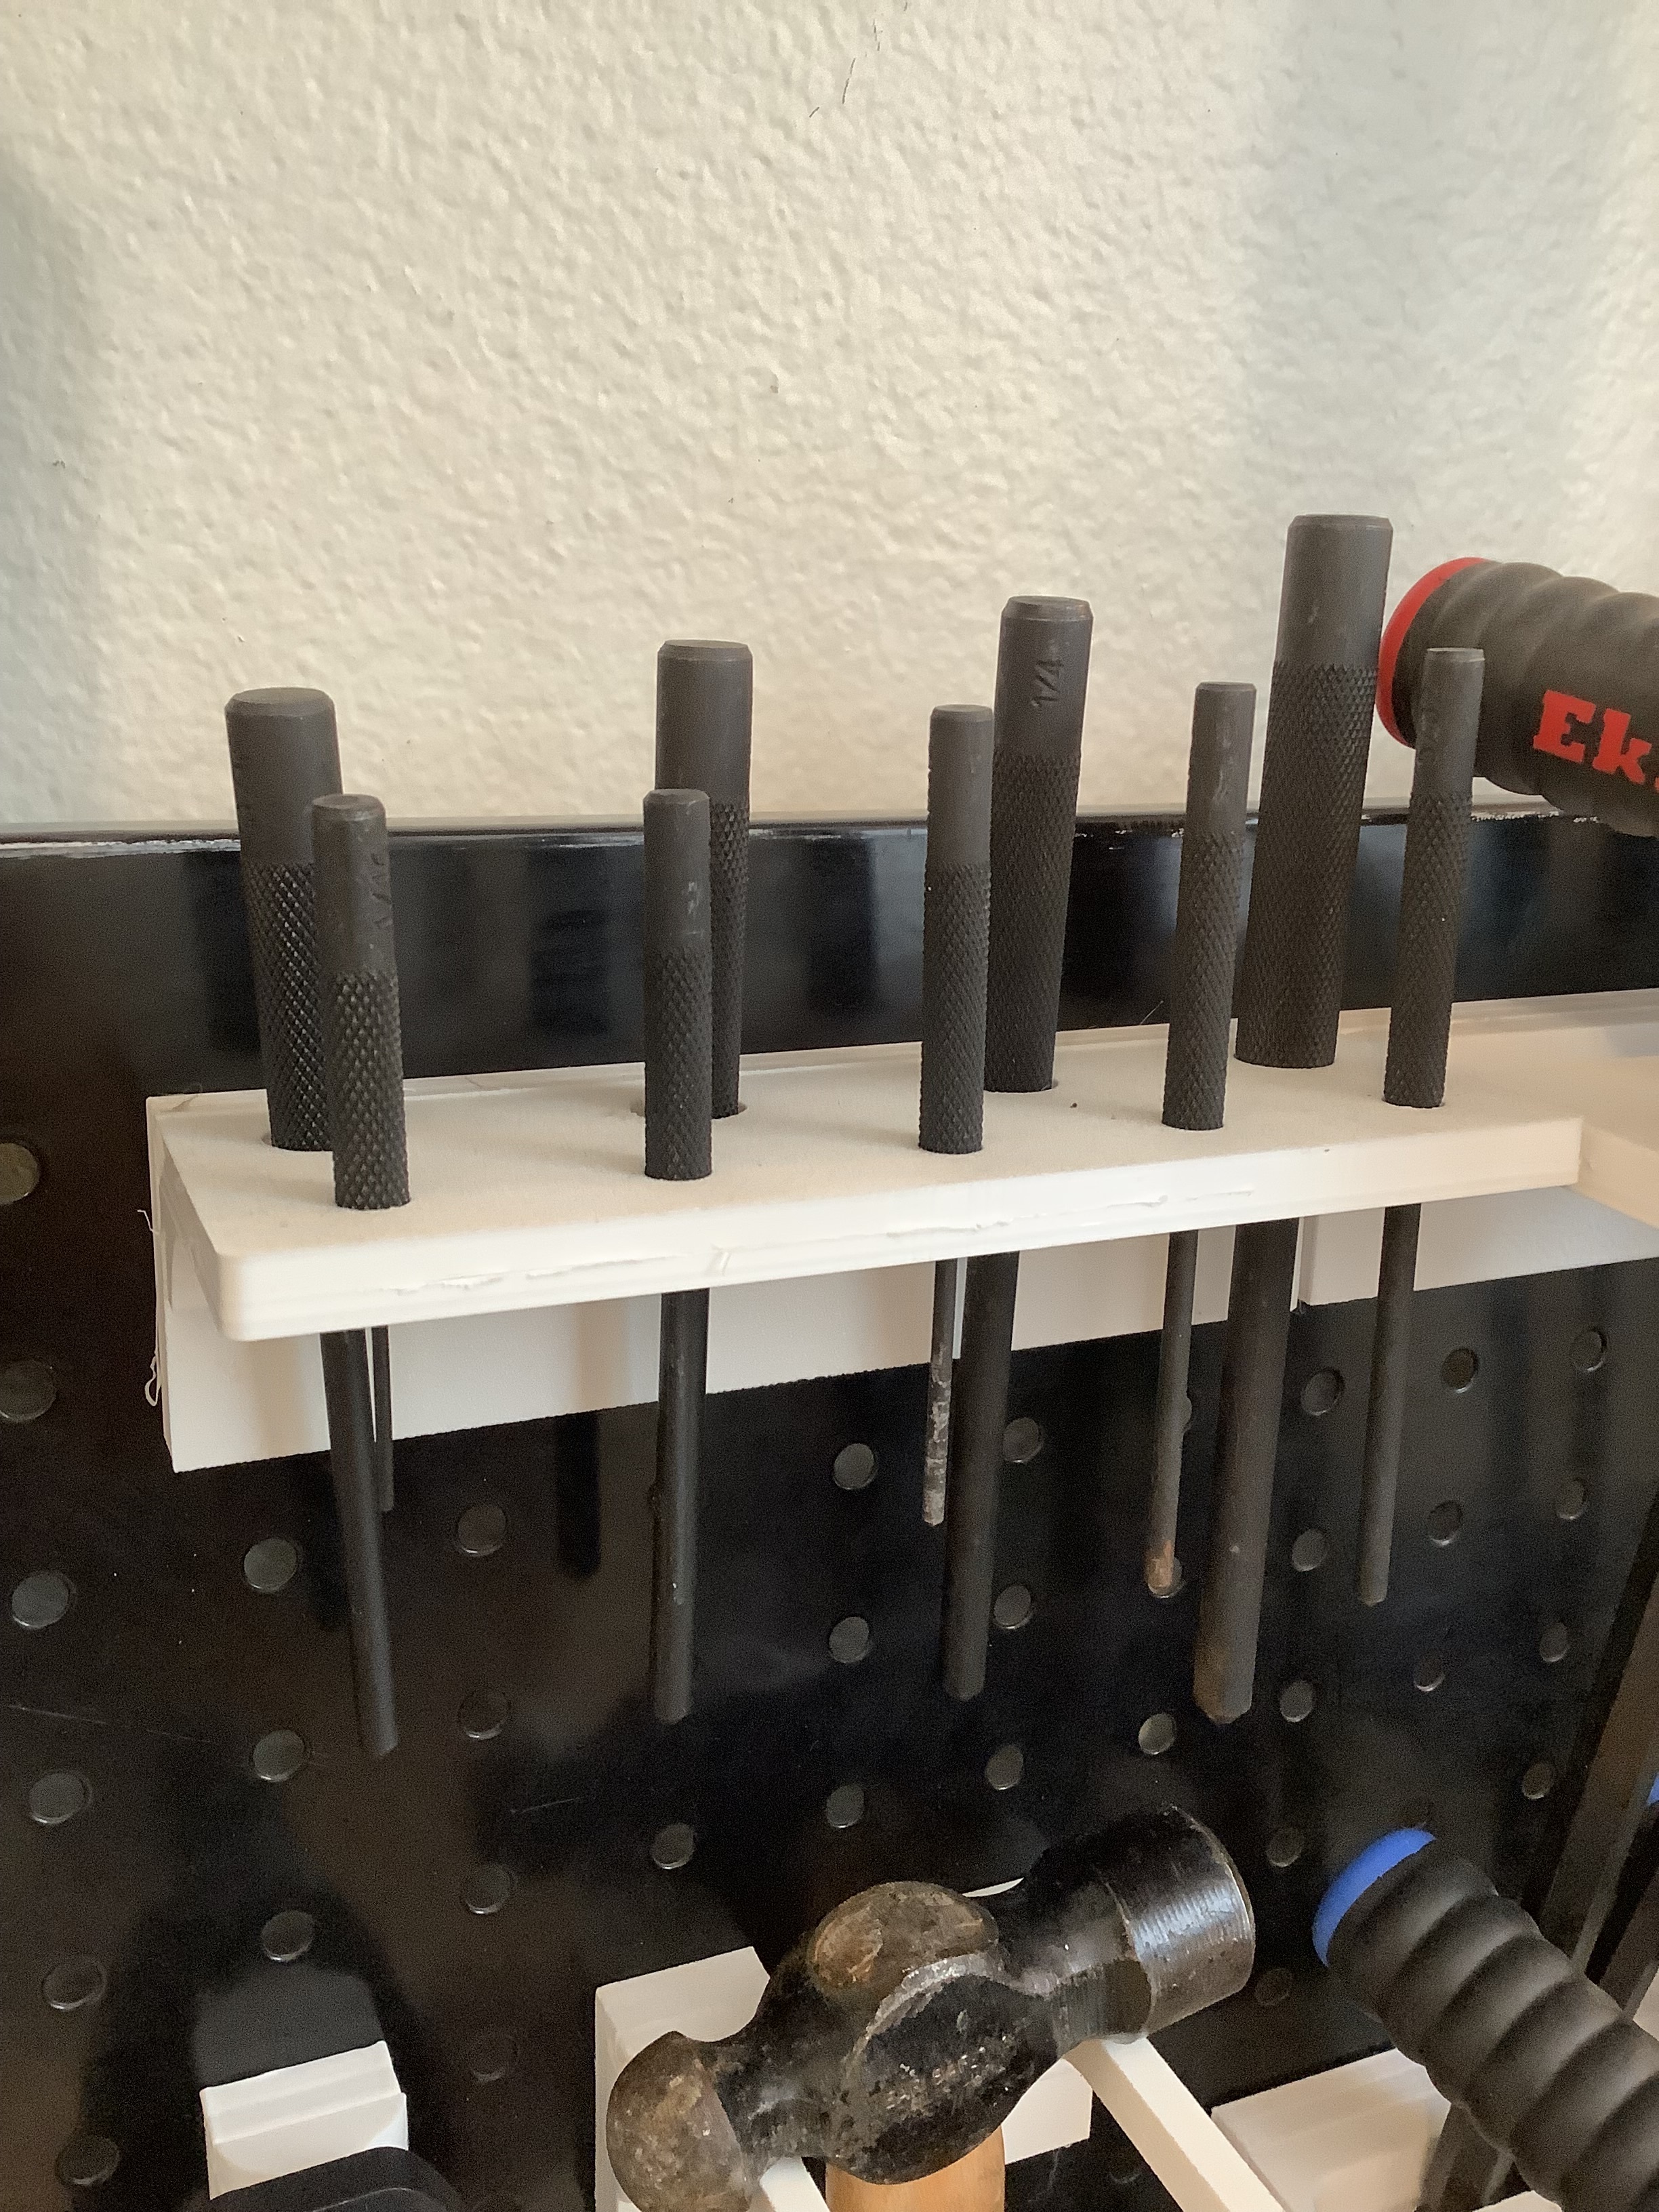
Punch Set Holders Peg - Same as alan key holders but for a punch set
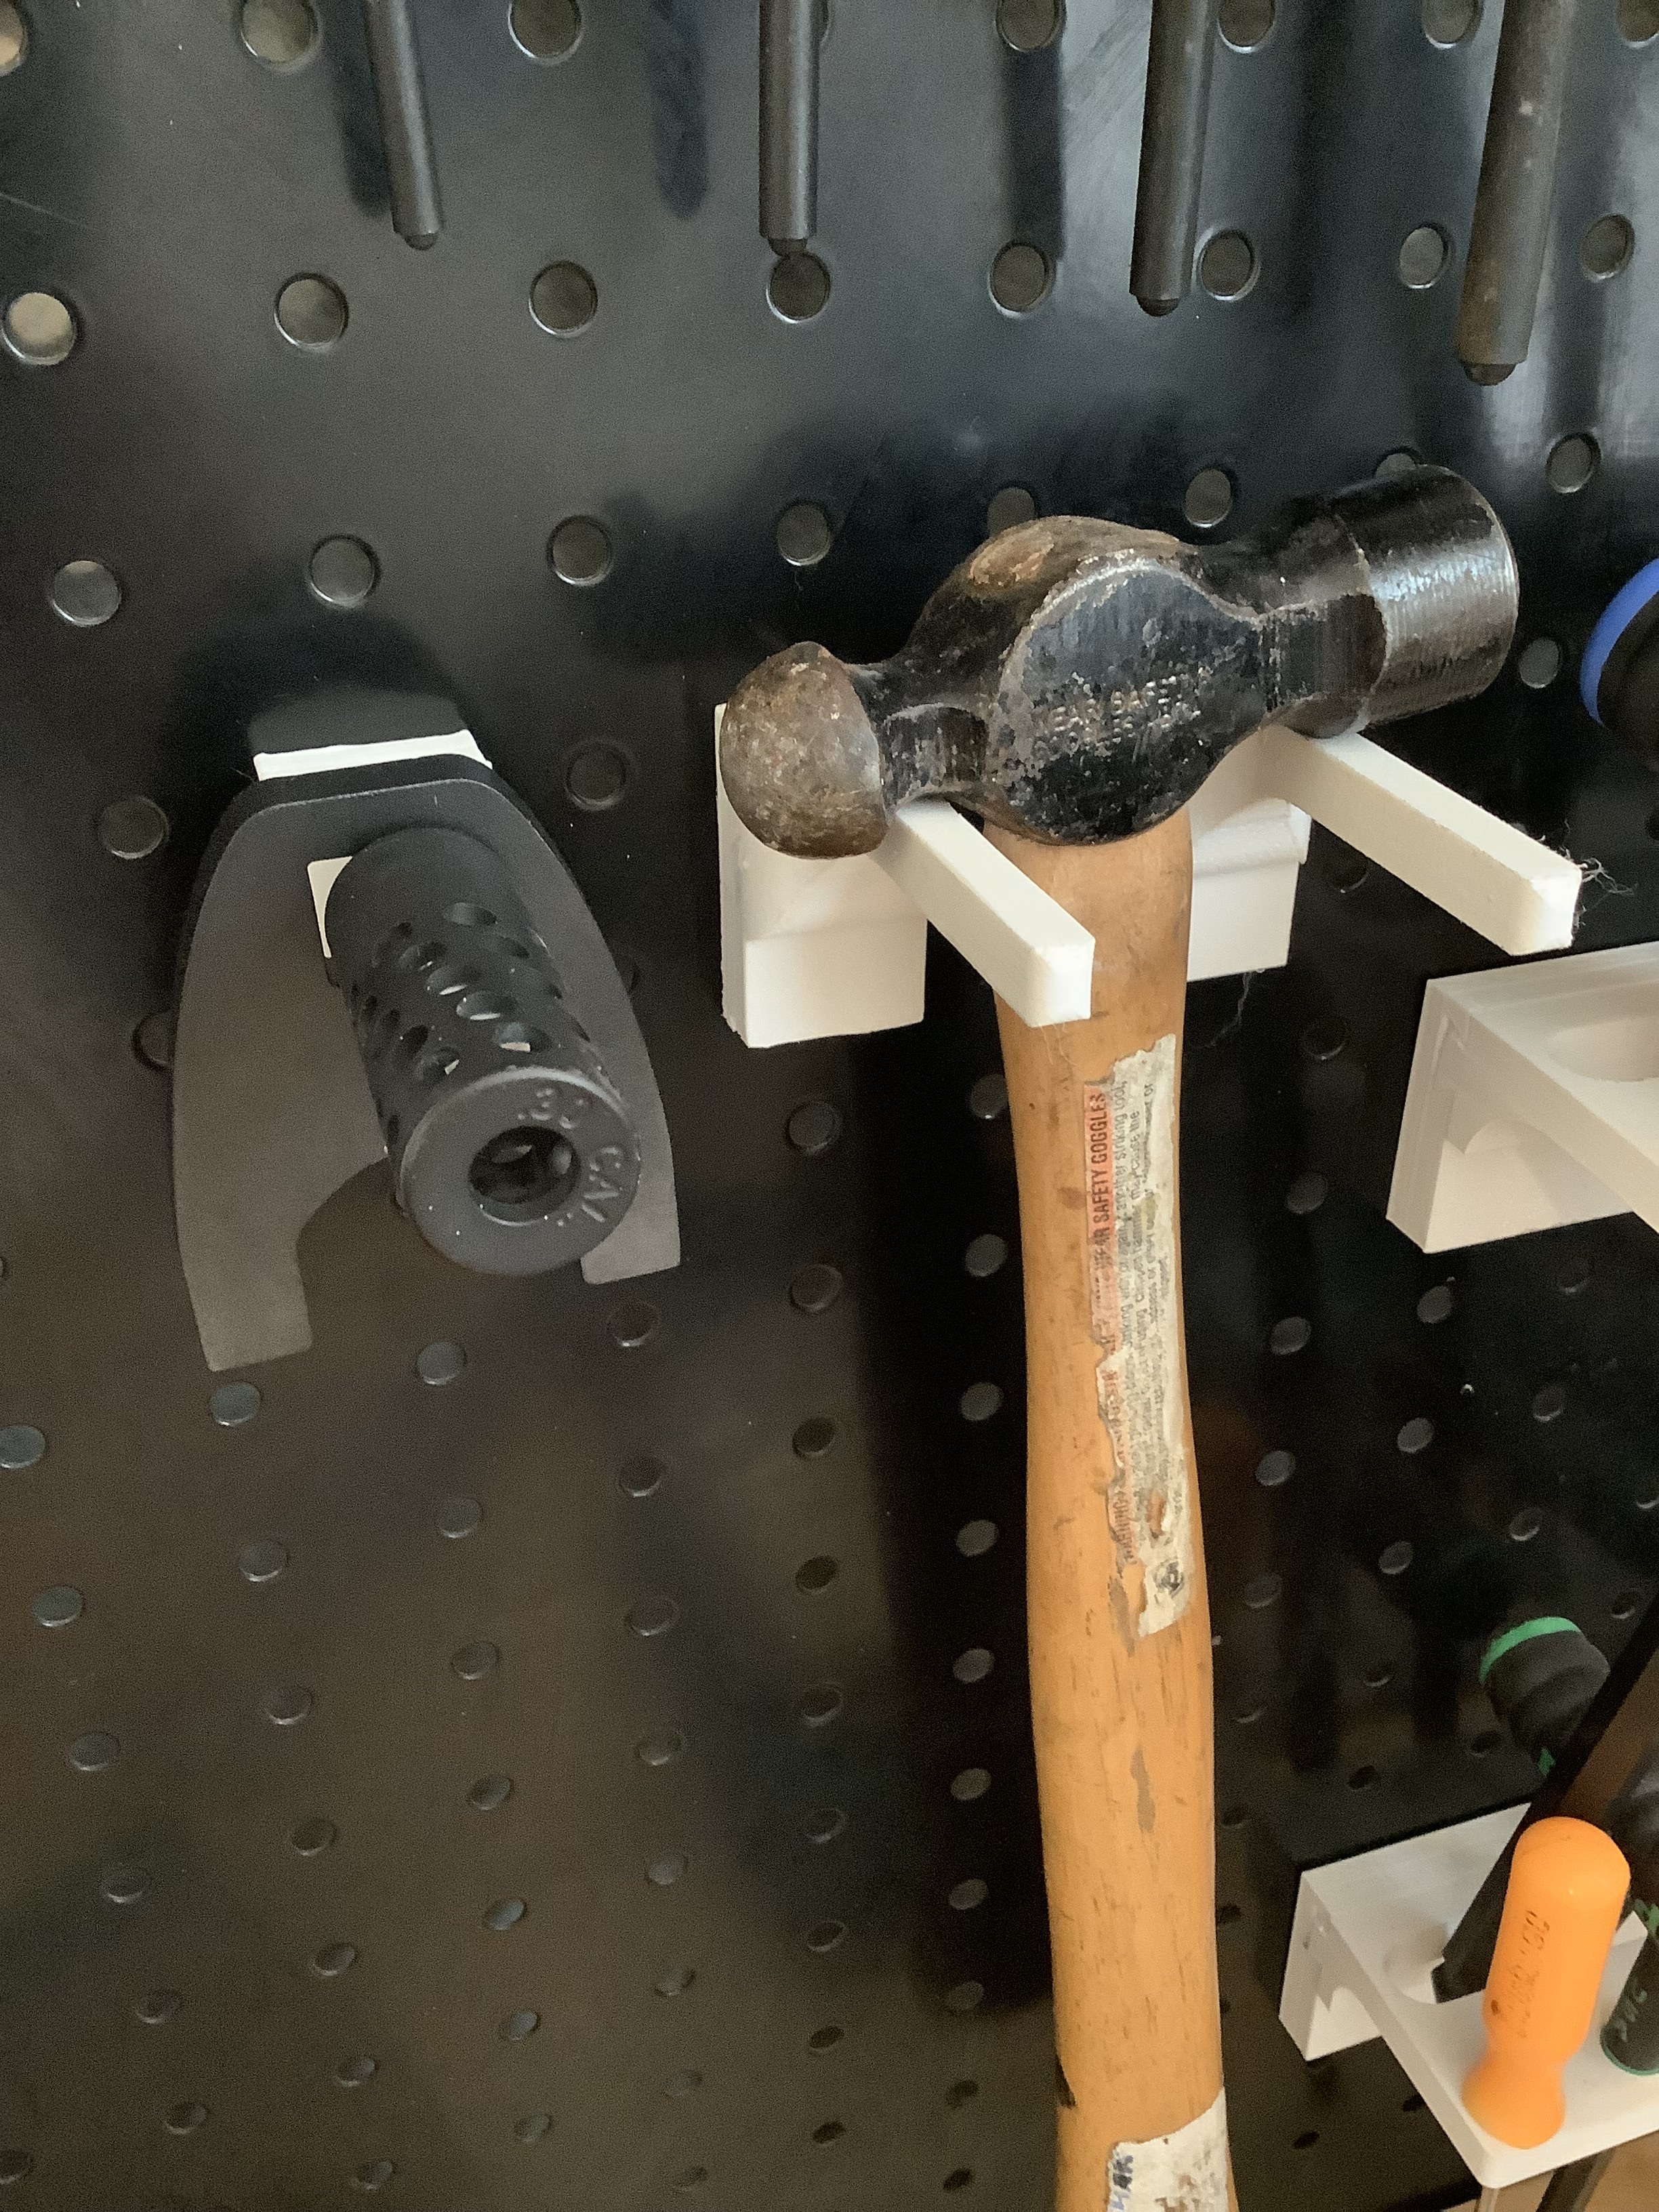
Small Straight Holder Peg - Random holders for snake pull-through cleaners and other stuff
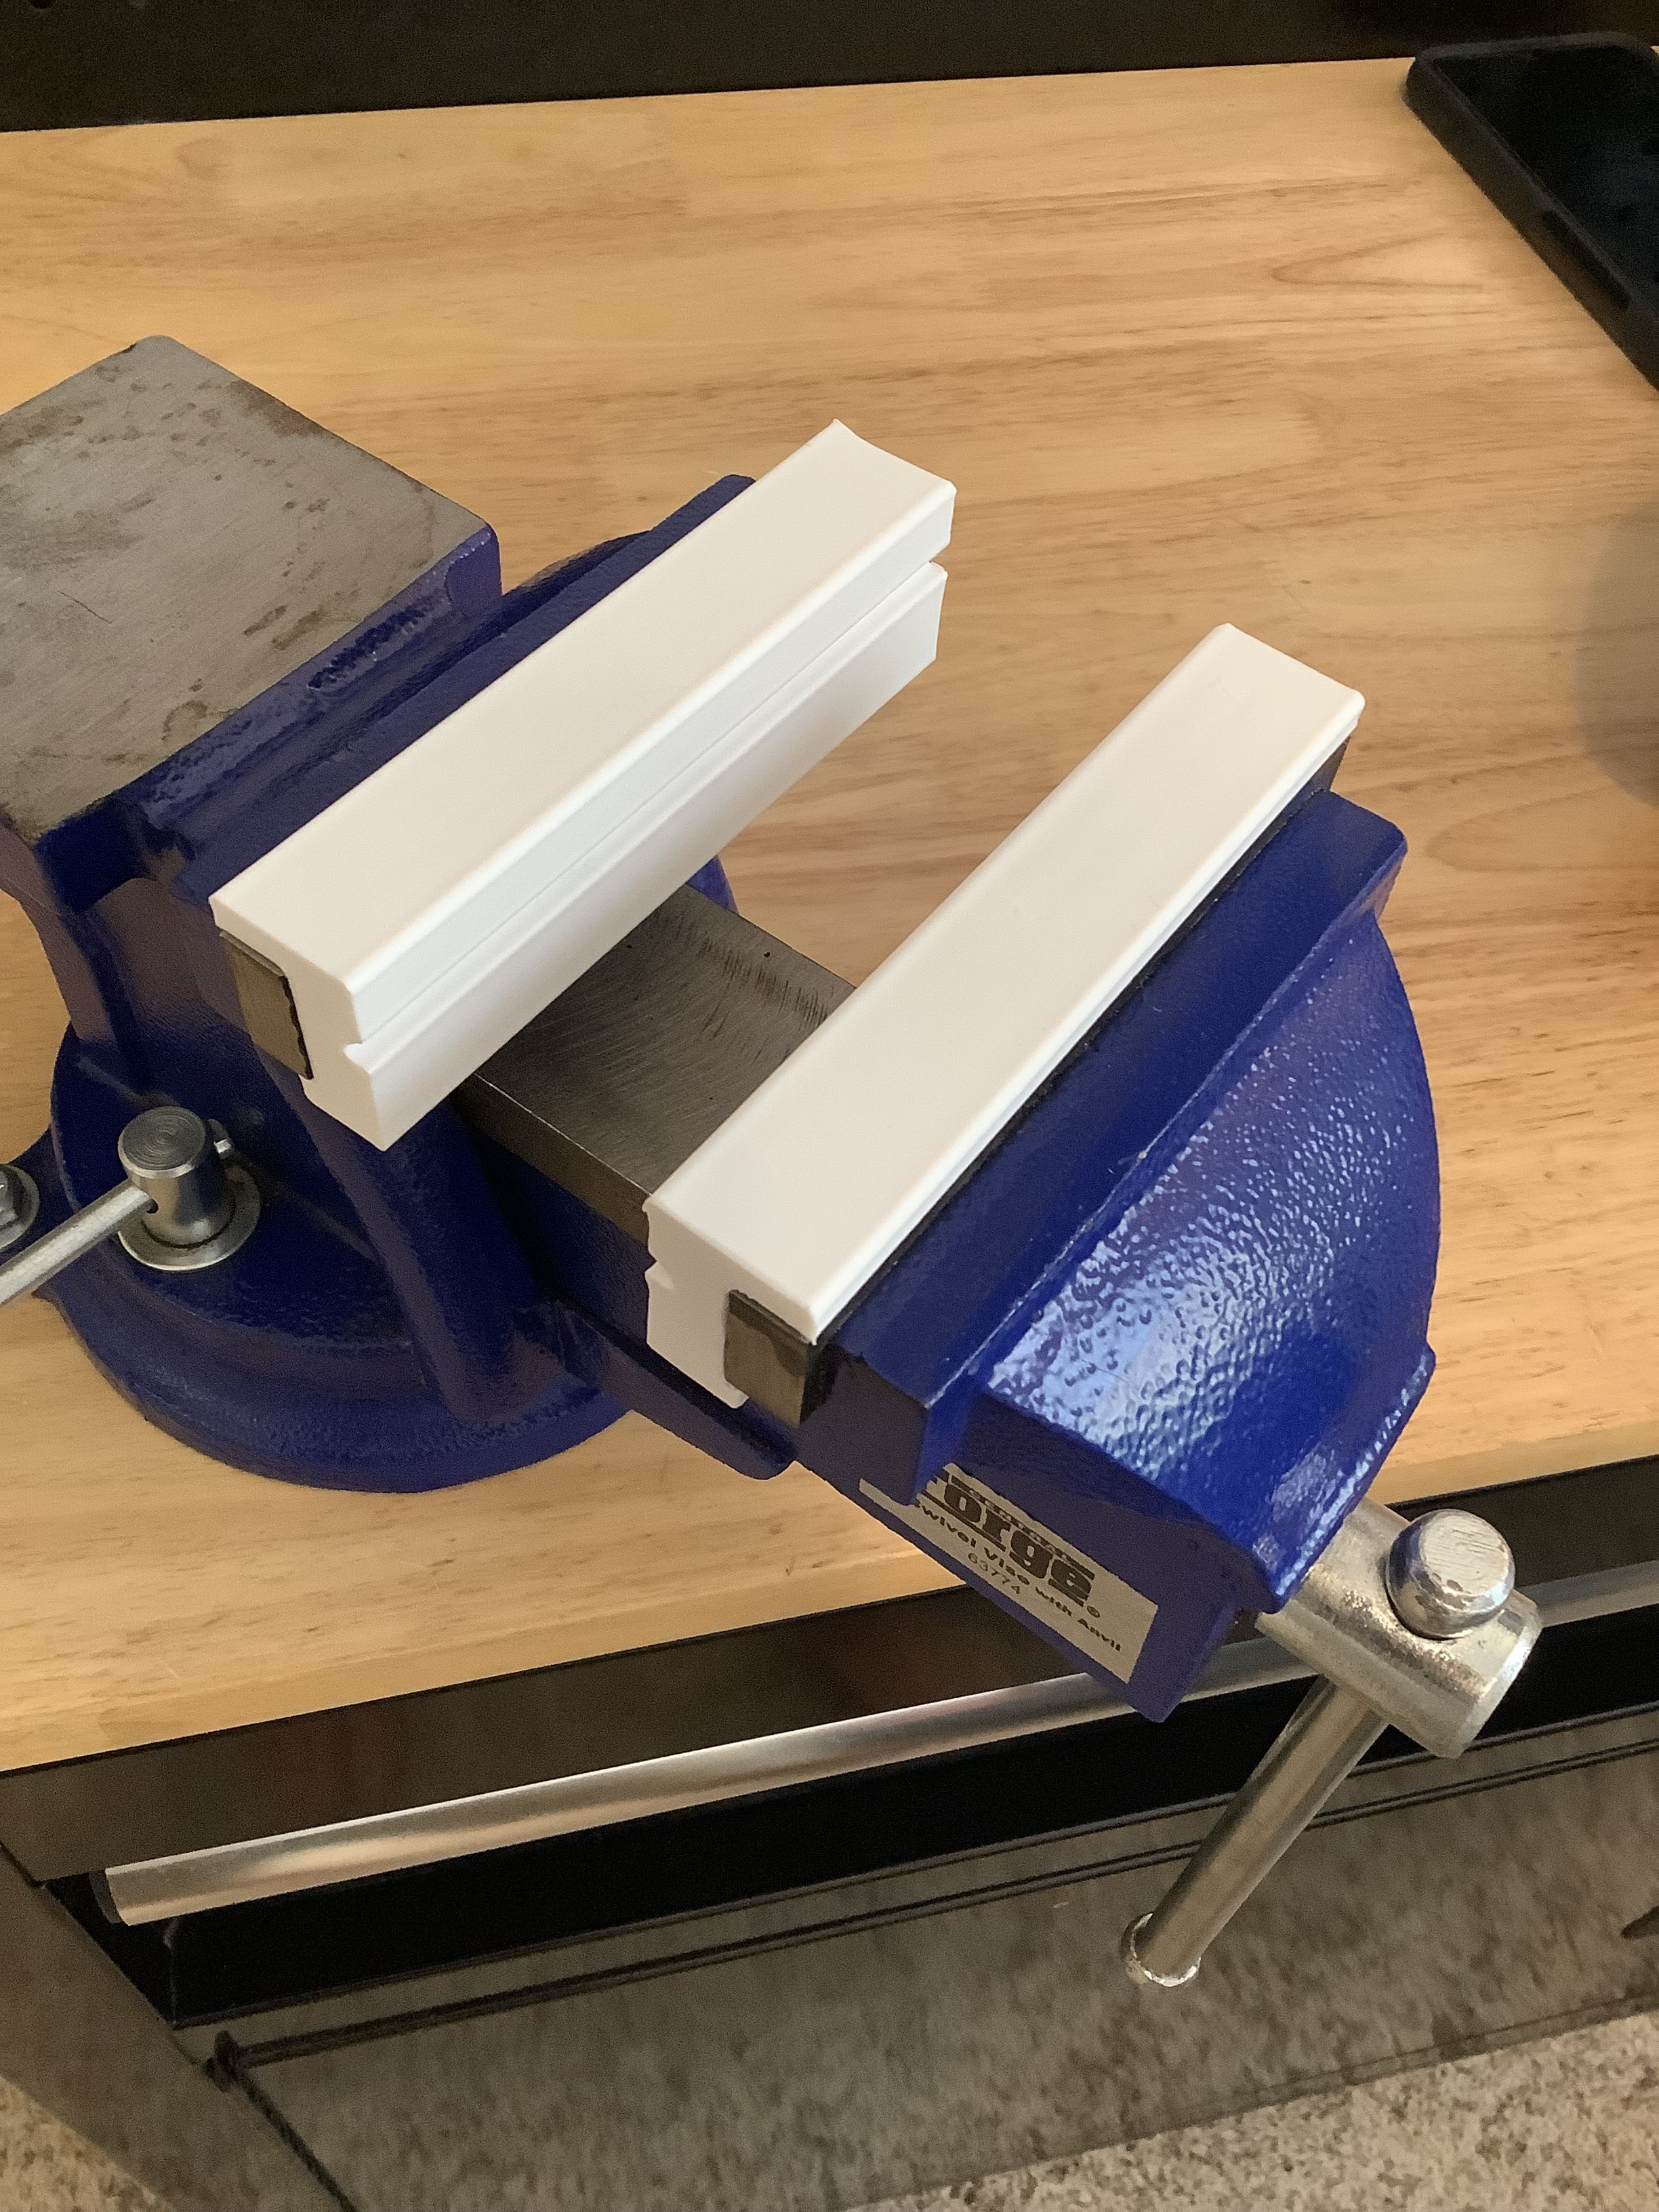
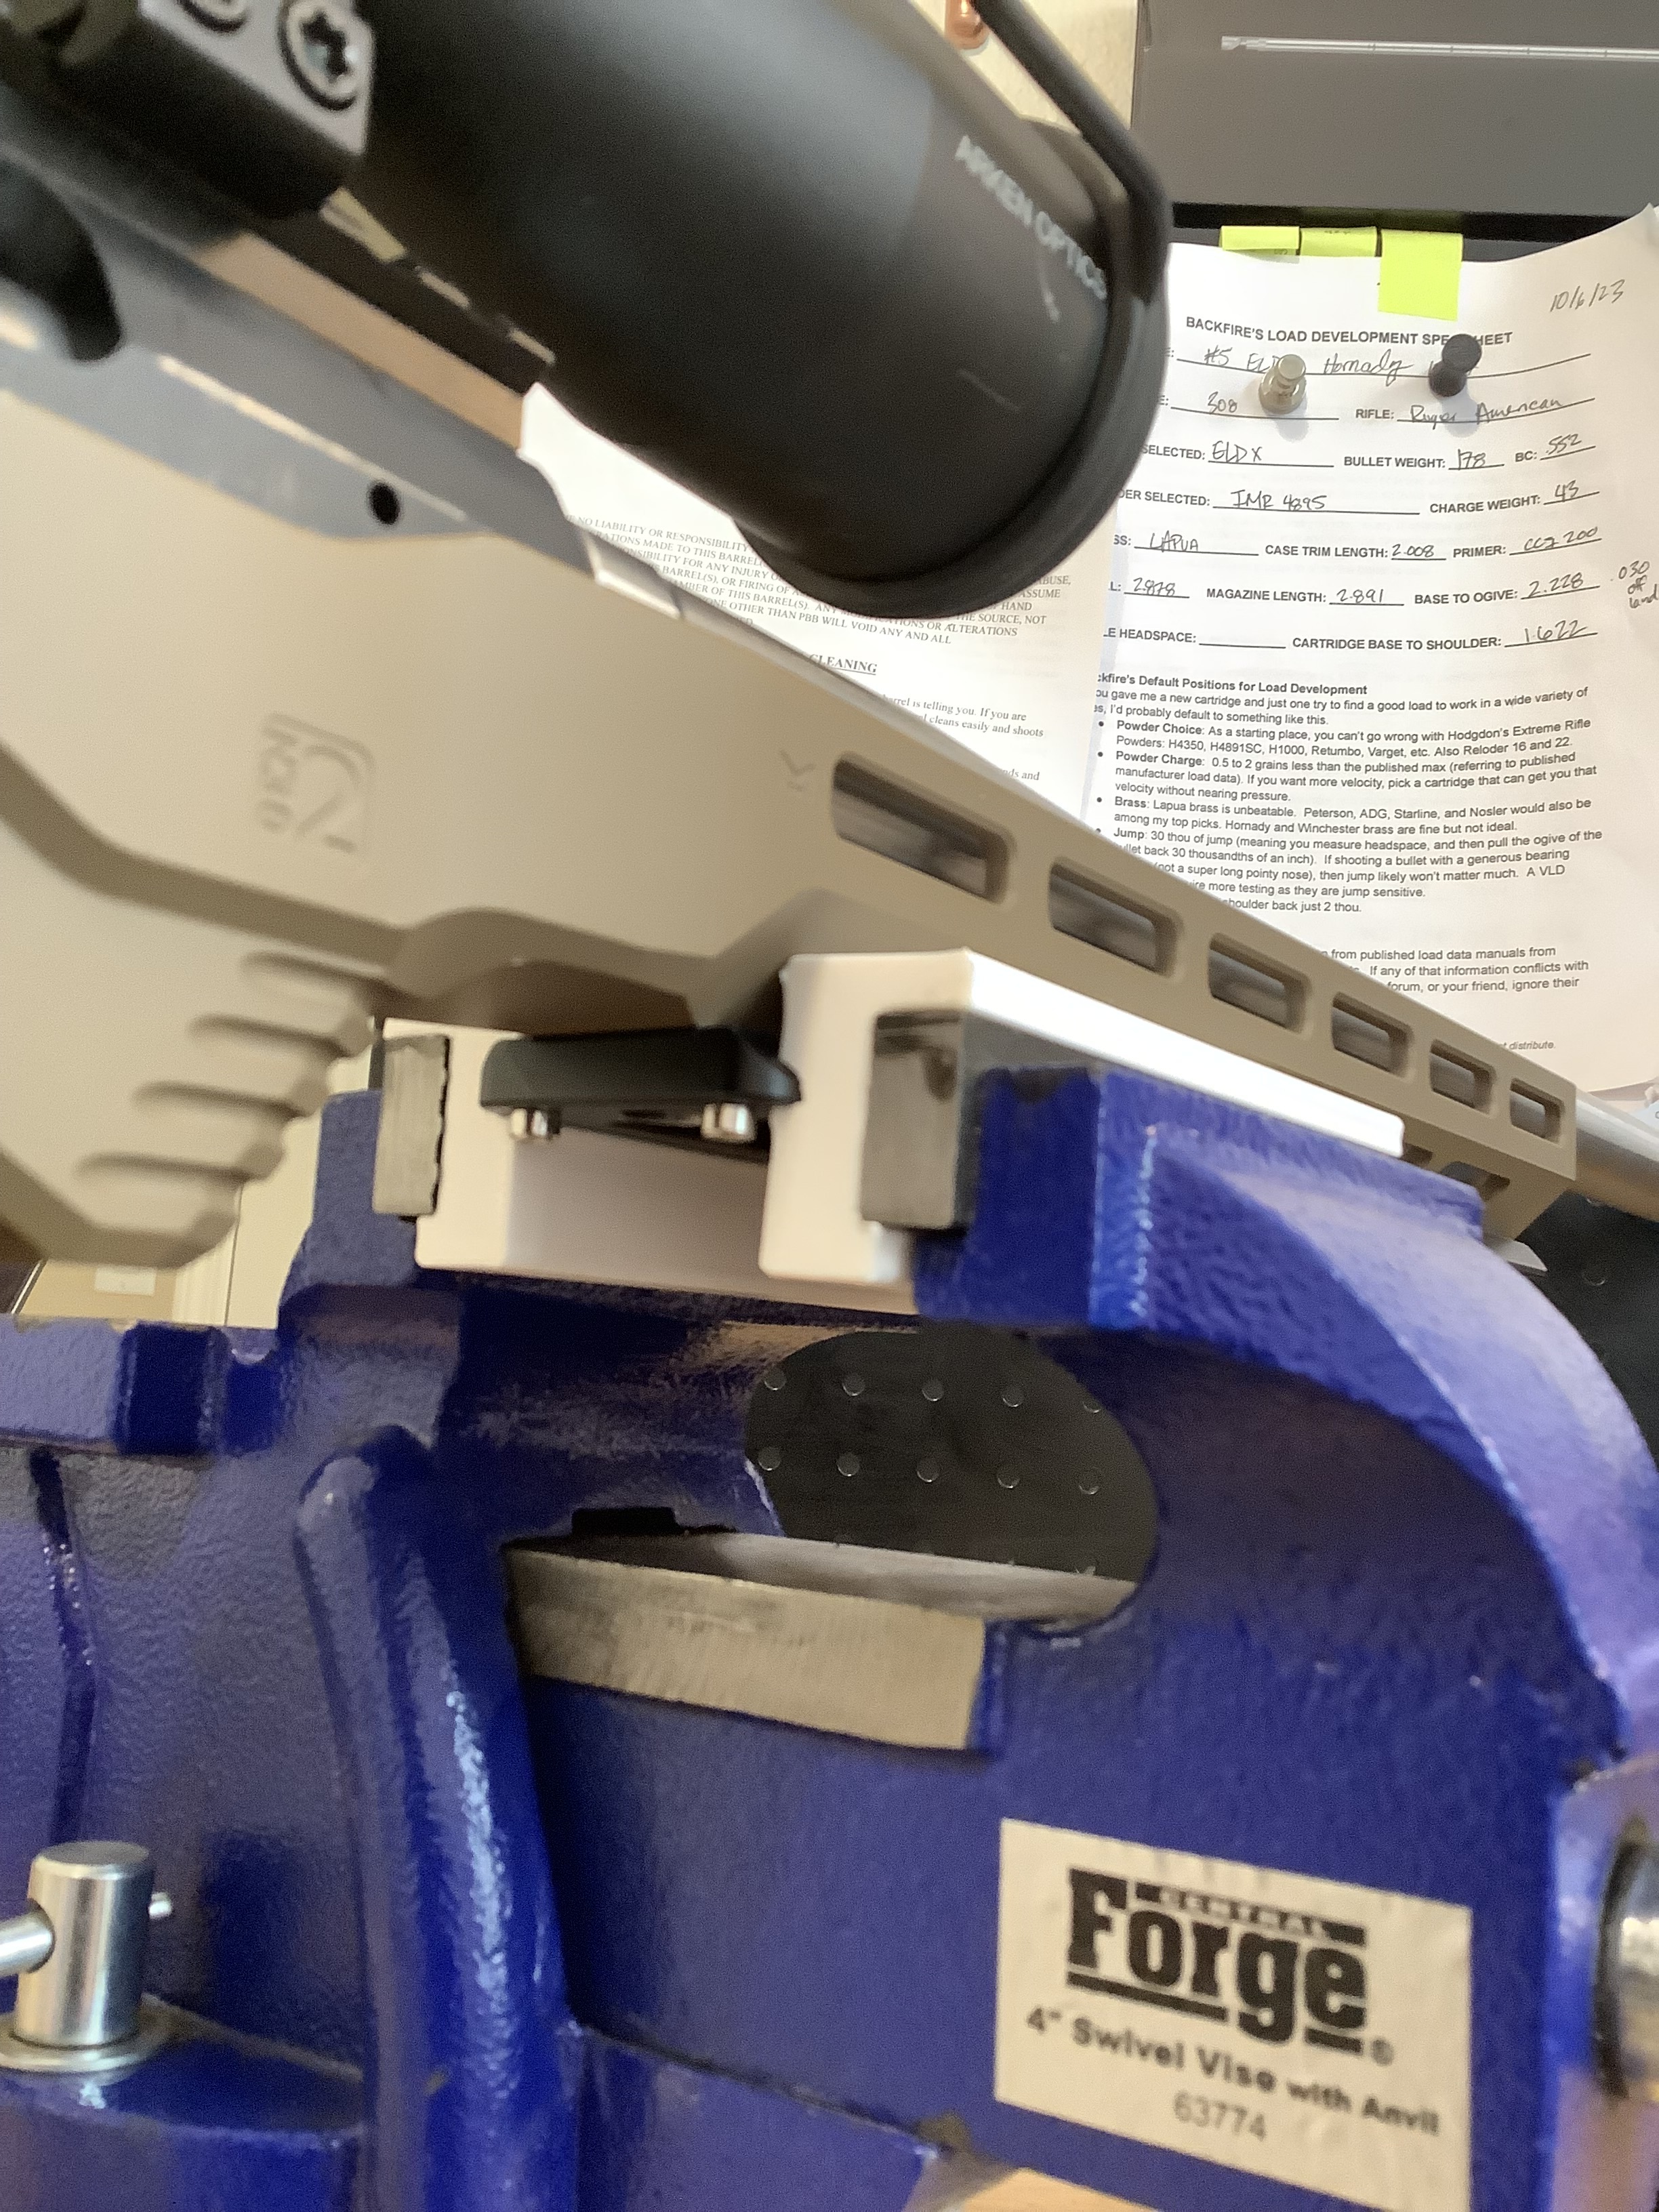
Soft Jaws for Vise (In development) - I want this to have an arca slot and have magnents on the back. Im testing out a few things here.
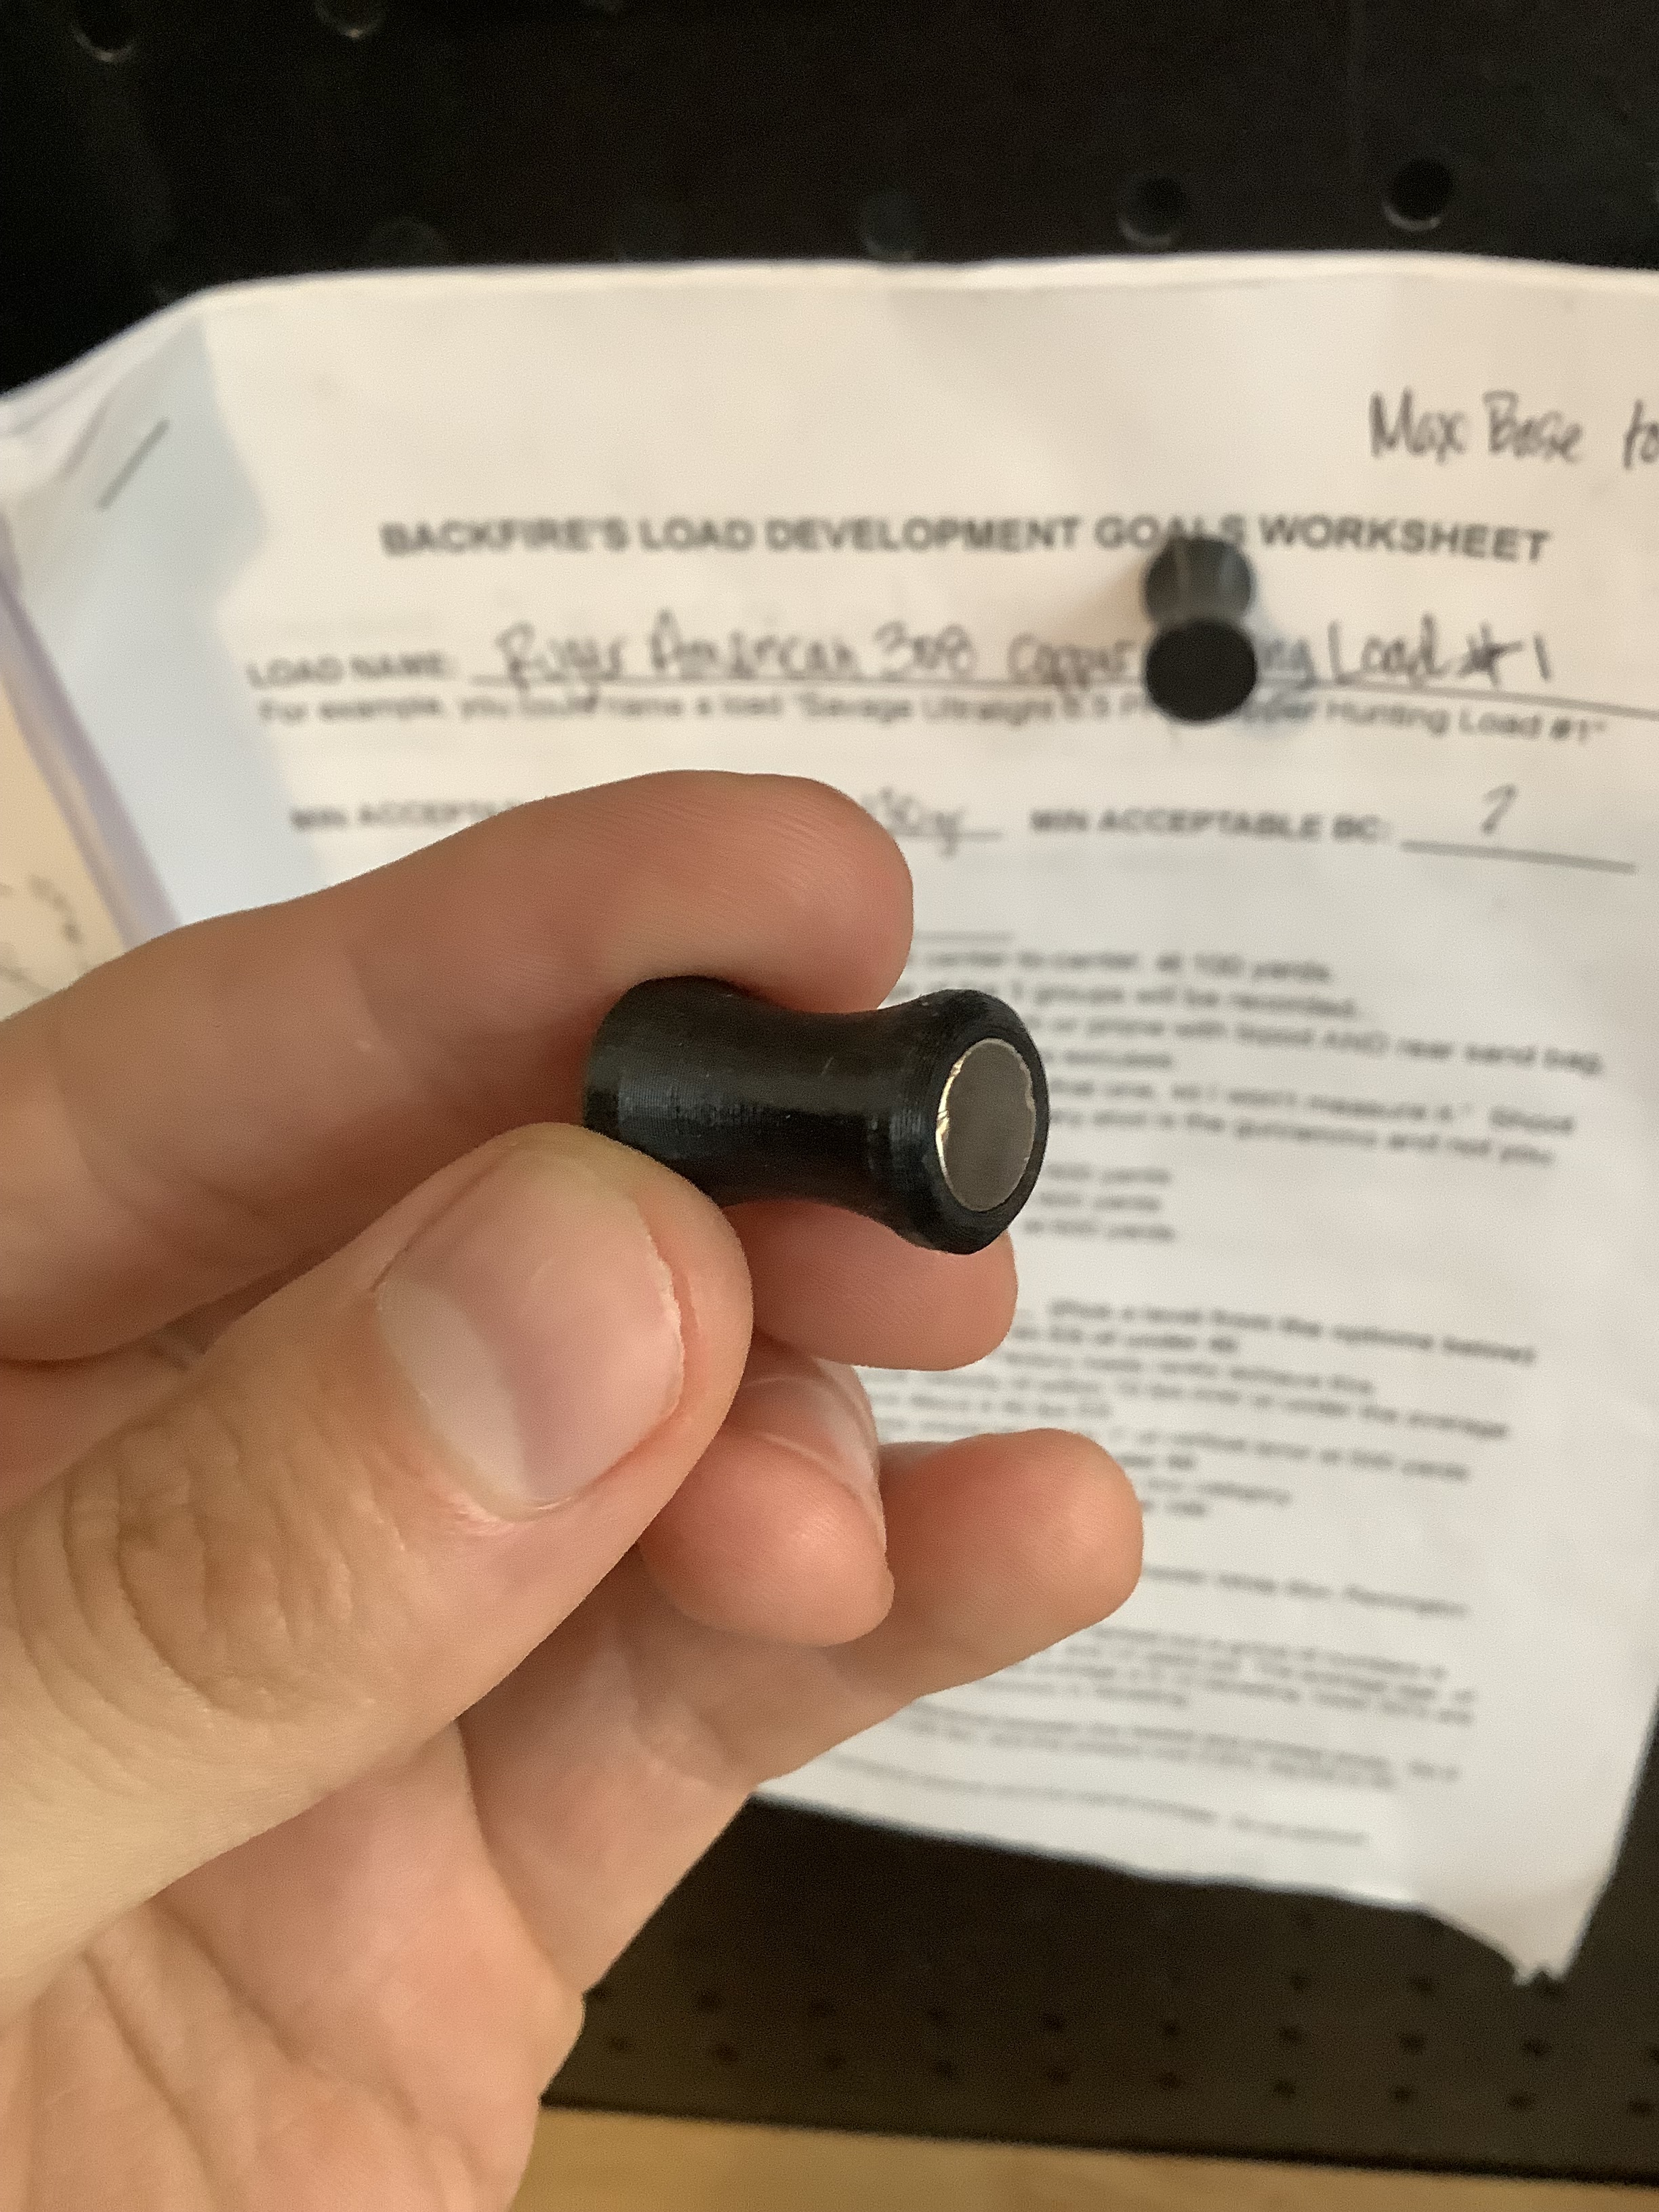
Magnet Base - This is to hold reloading papers (Reloading development papers from @backfire of course!) against my metal peg board. 8x3mm magnents
Gun:
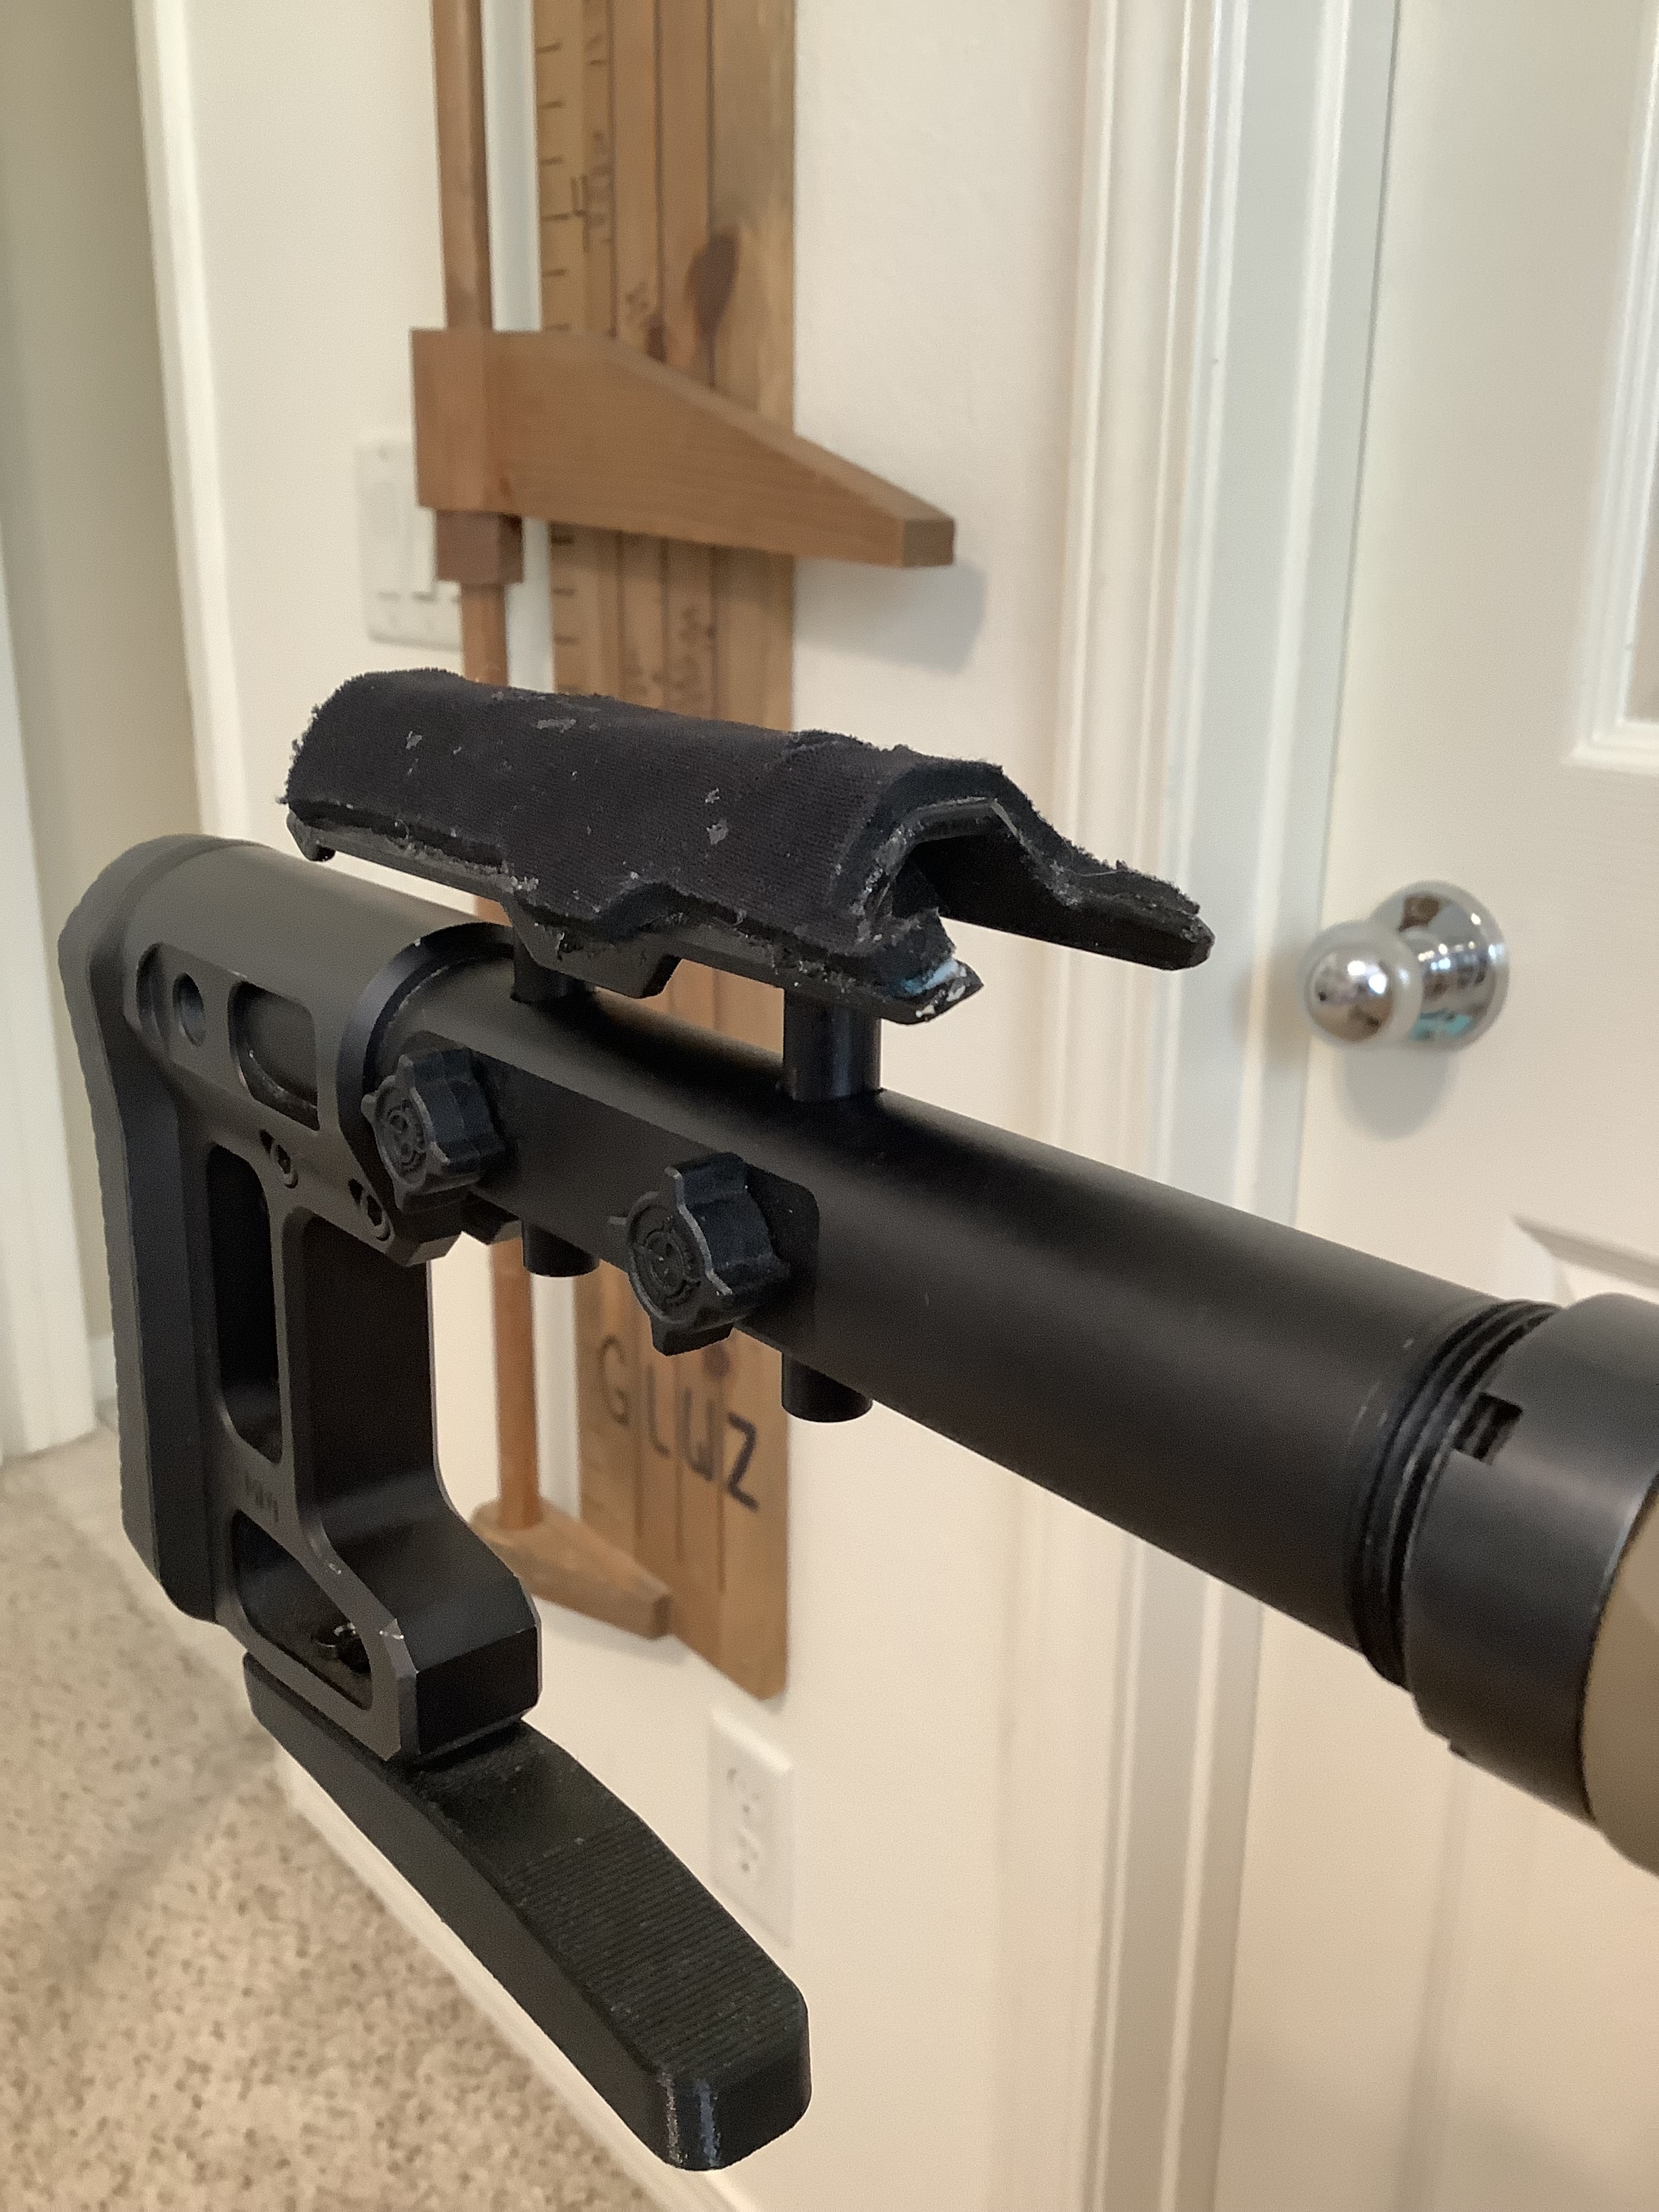
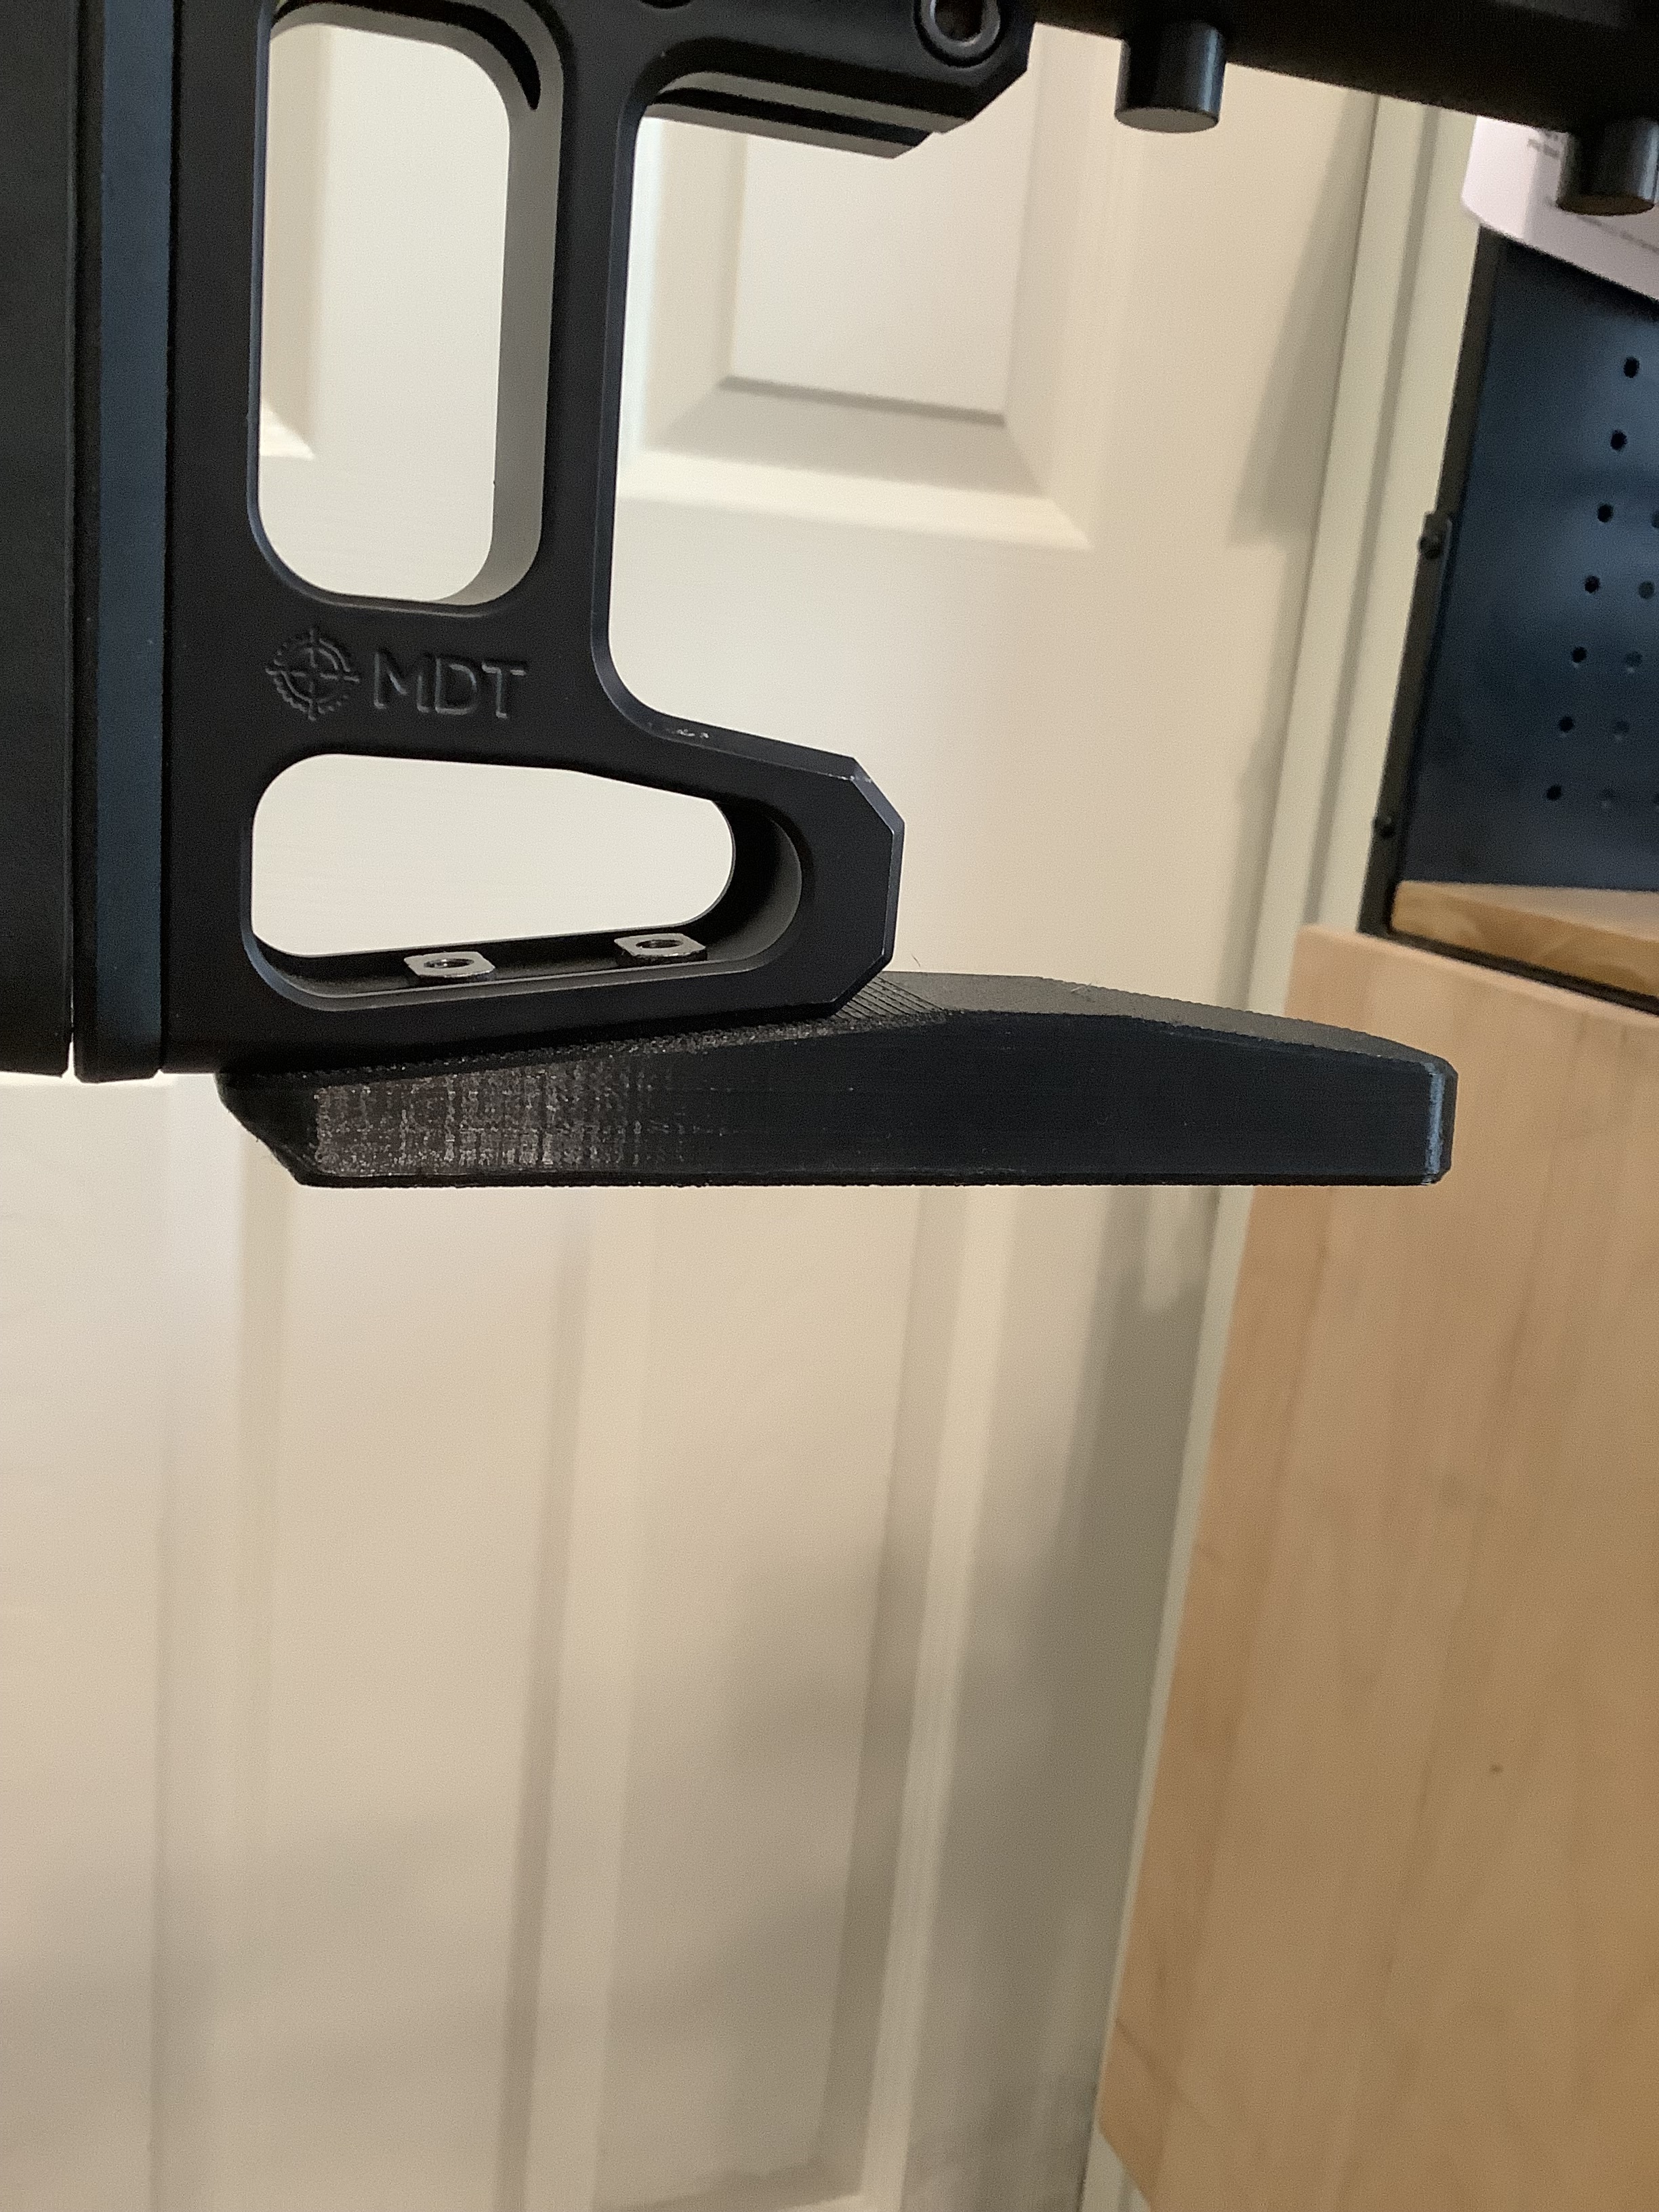
Thin Profile Cheek Rest For MDT SCS-LITE Stock - This one costs $30 from MDT (MDT Elite Cheekpiece), so I modeled my own. I wanted this because it get’s me more inline with my scope than the one that came with the SCS Lite Stock.
MDT Rear Bag Rider - This one I modeled myself, but is very similar to the one they have on their website. I saved $50 by doing this myself. Obviously this one is more flexible than the aluminum one on the website.
MDT Vertical Adjustment Buttpad - Im not sure I would recommend this one, but it was a fun experiment. It does for sure work, but if the vertical is adjusted often then it would make screw imprints into the plastic, and may become problematic over time.
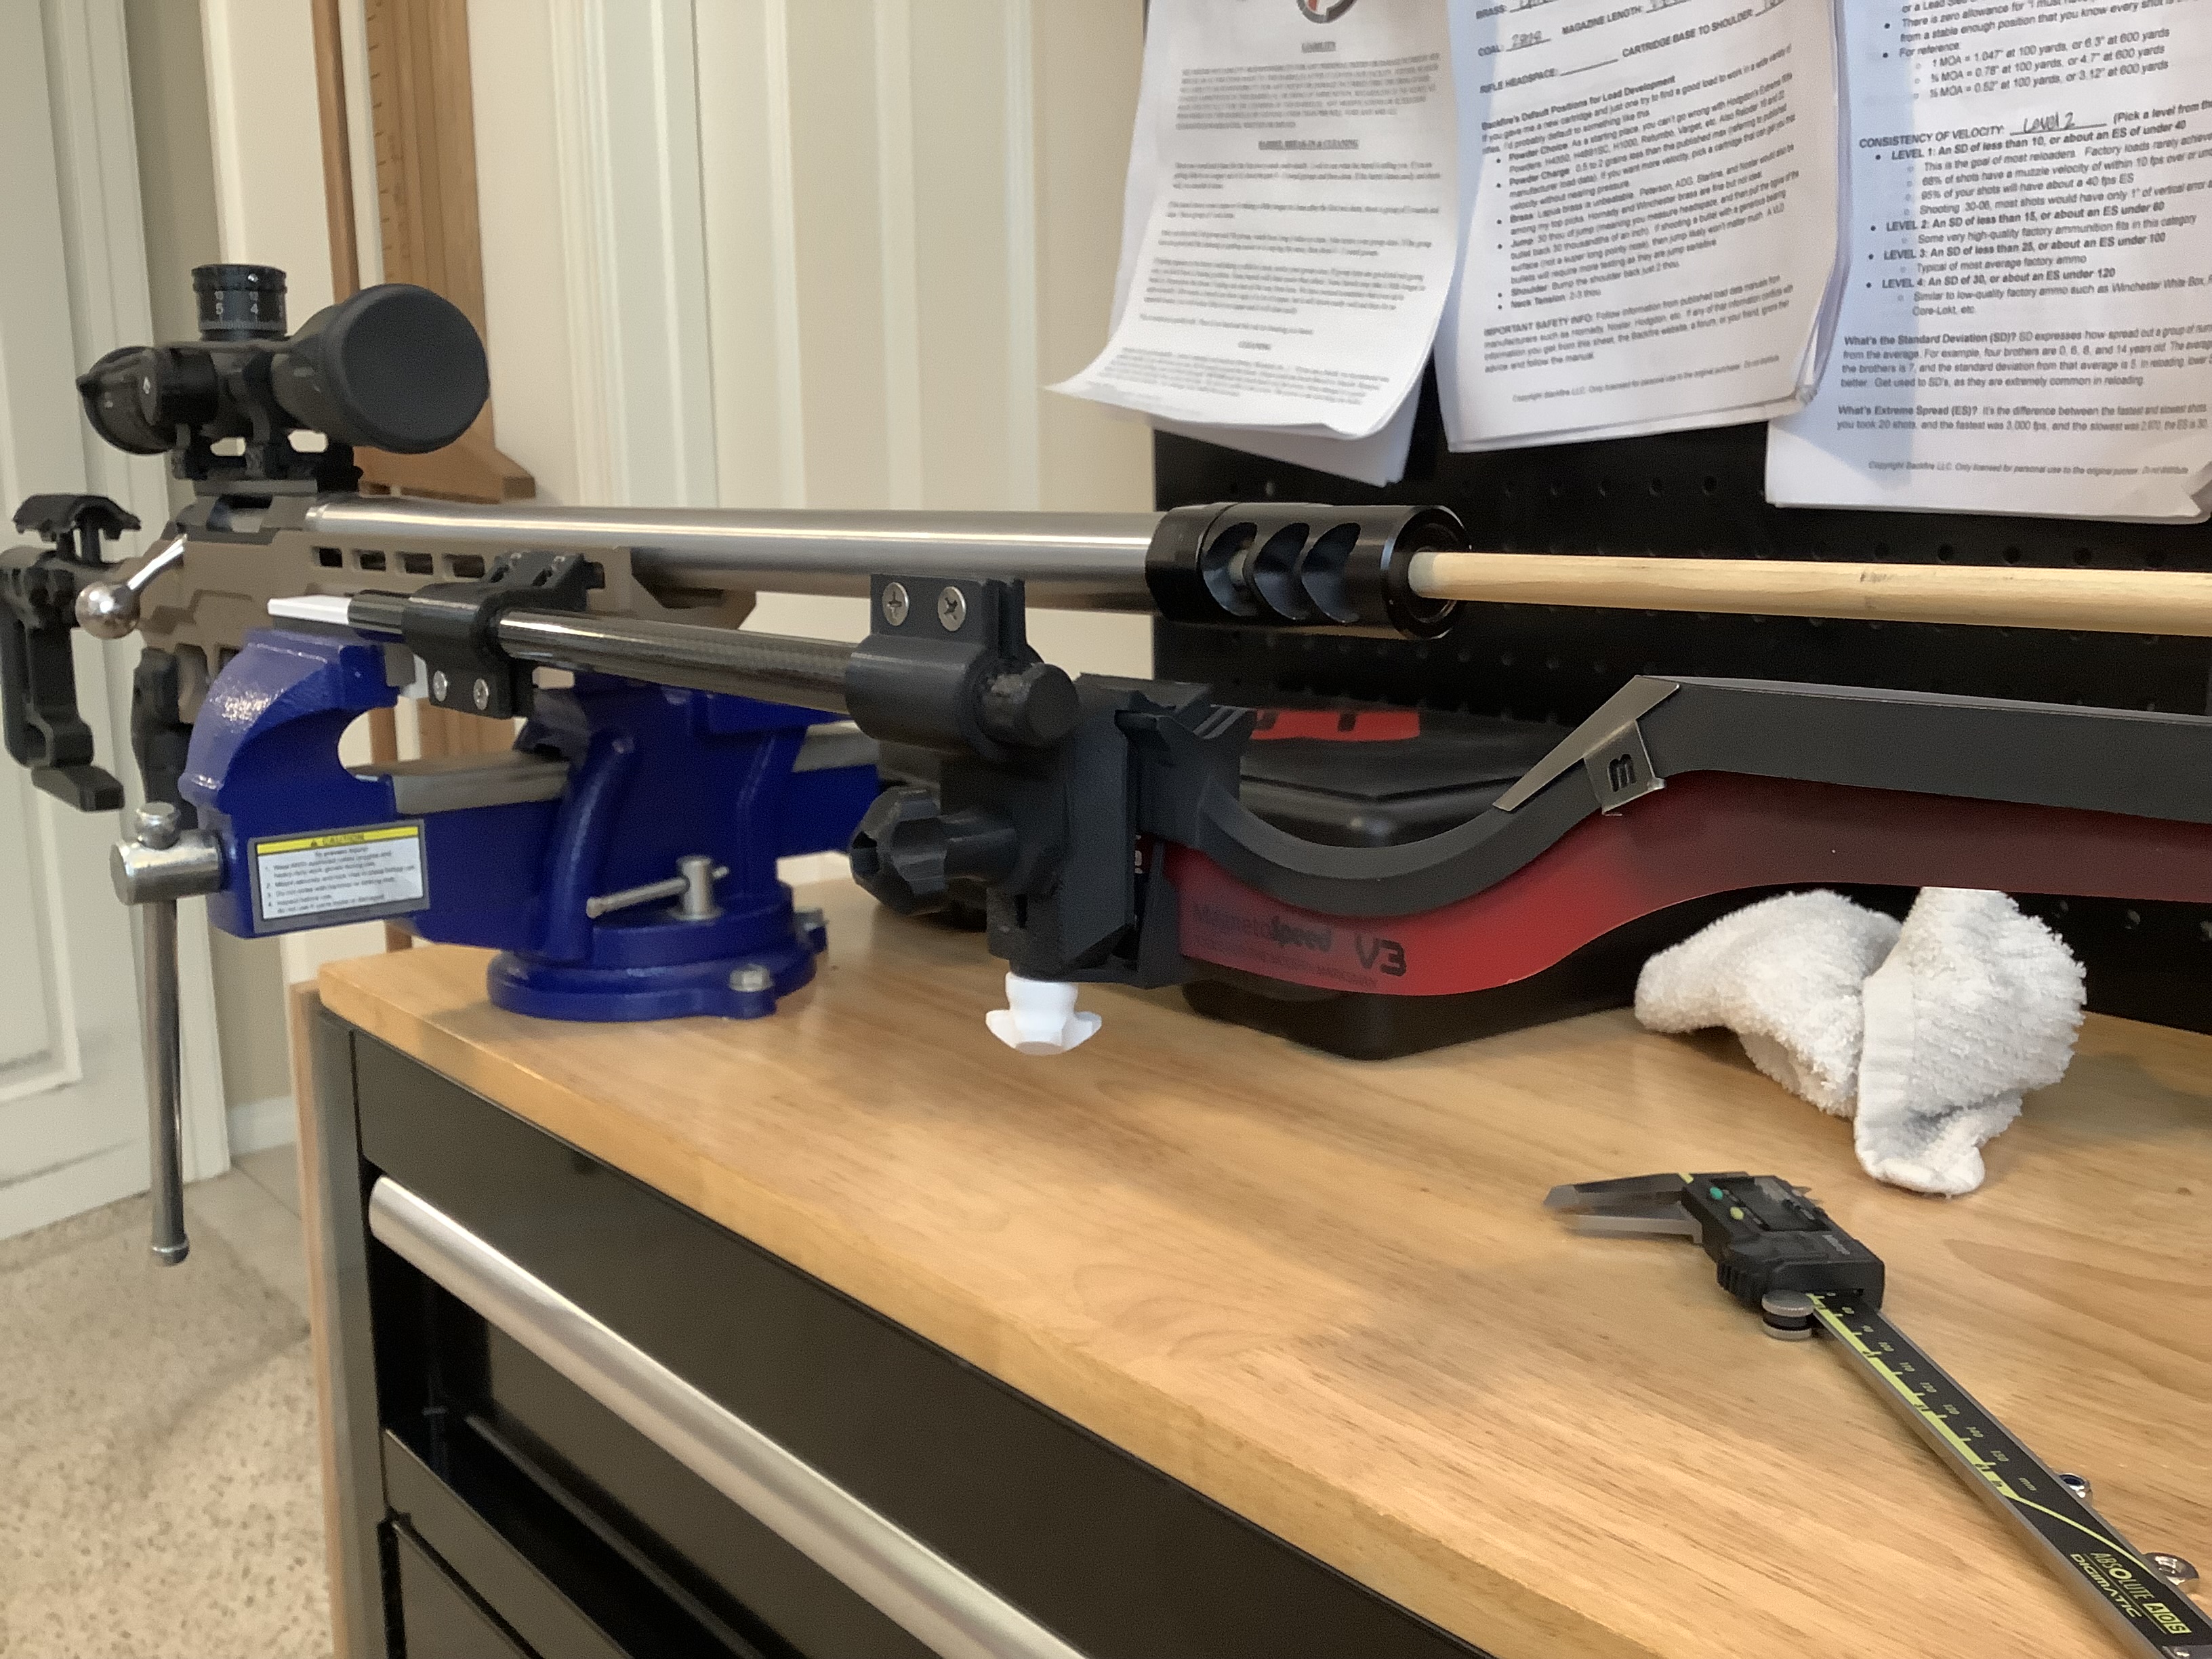
MLOCK to Magnetospeed v3 - This is a whole bracket that attaches to my MDT LSS stock forend, and attaches to my magnetospeed. It requires a carbon fiber rod purchased from amazon and some extra nuts and bots. I suppose it could work with any MLOCK forend.
Nice list. Incredible what these 3d printers can do!
They have gotten so much more reliable. Still sometimes a headache, but super capable. I think we now have like 20 Bambu Labs printers now just churning stuff out 24/7.
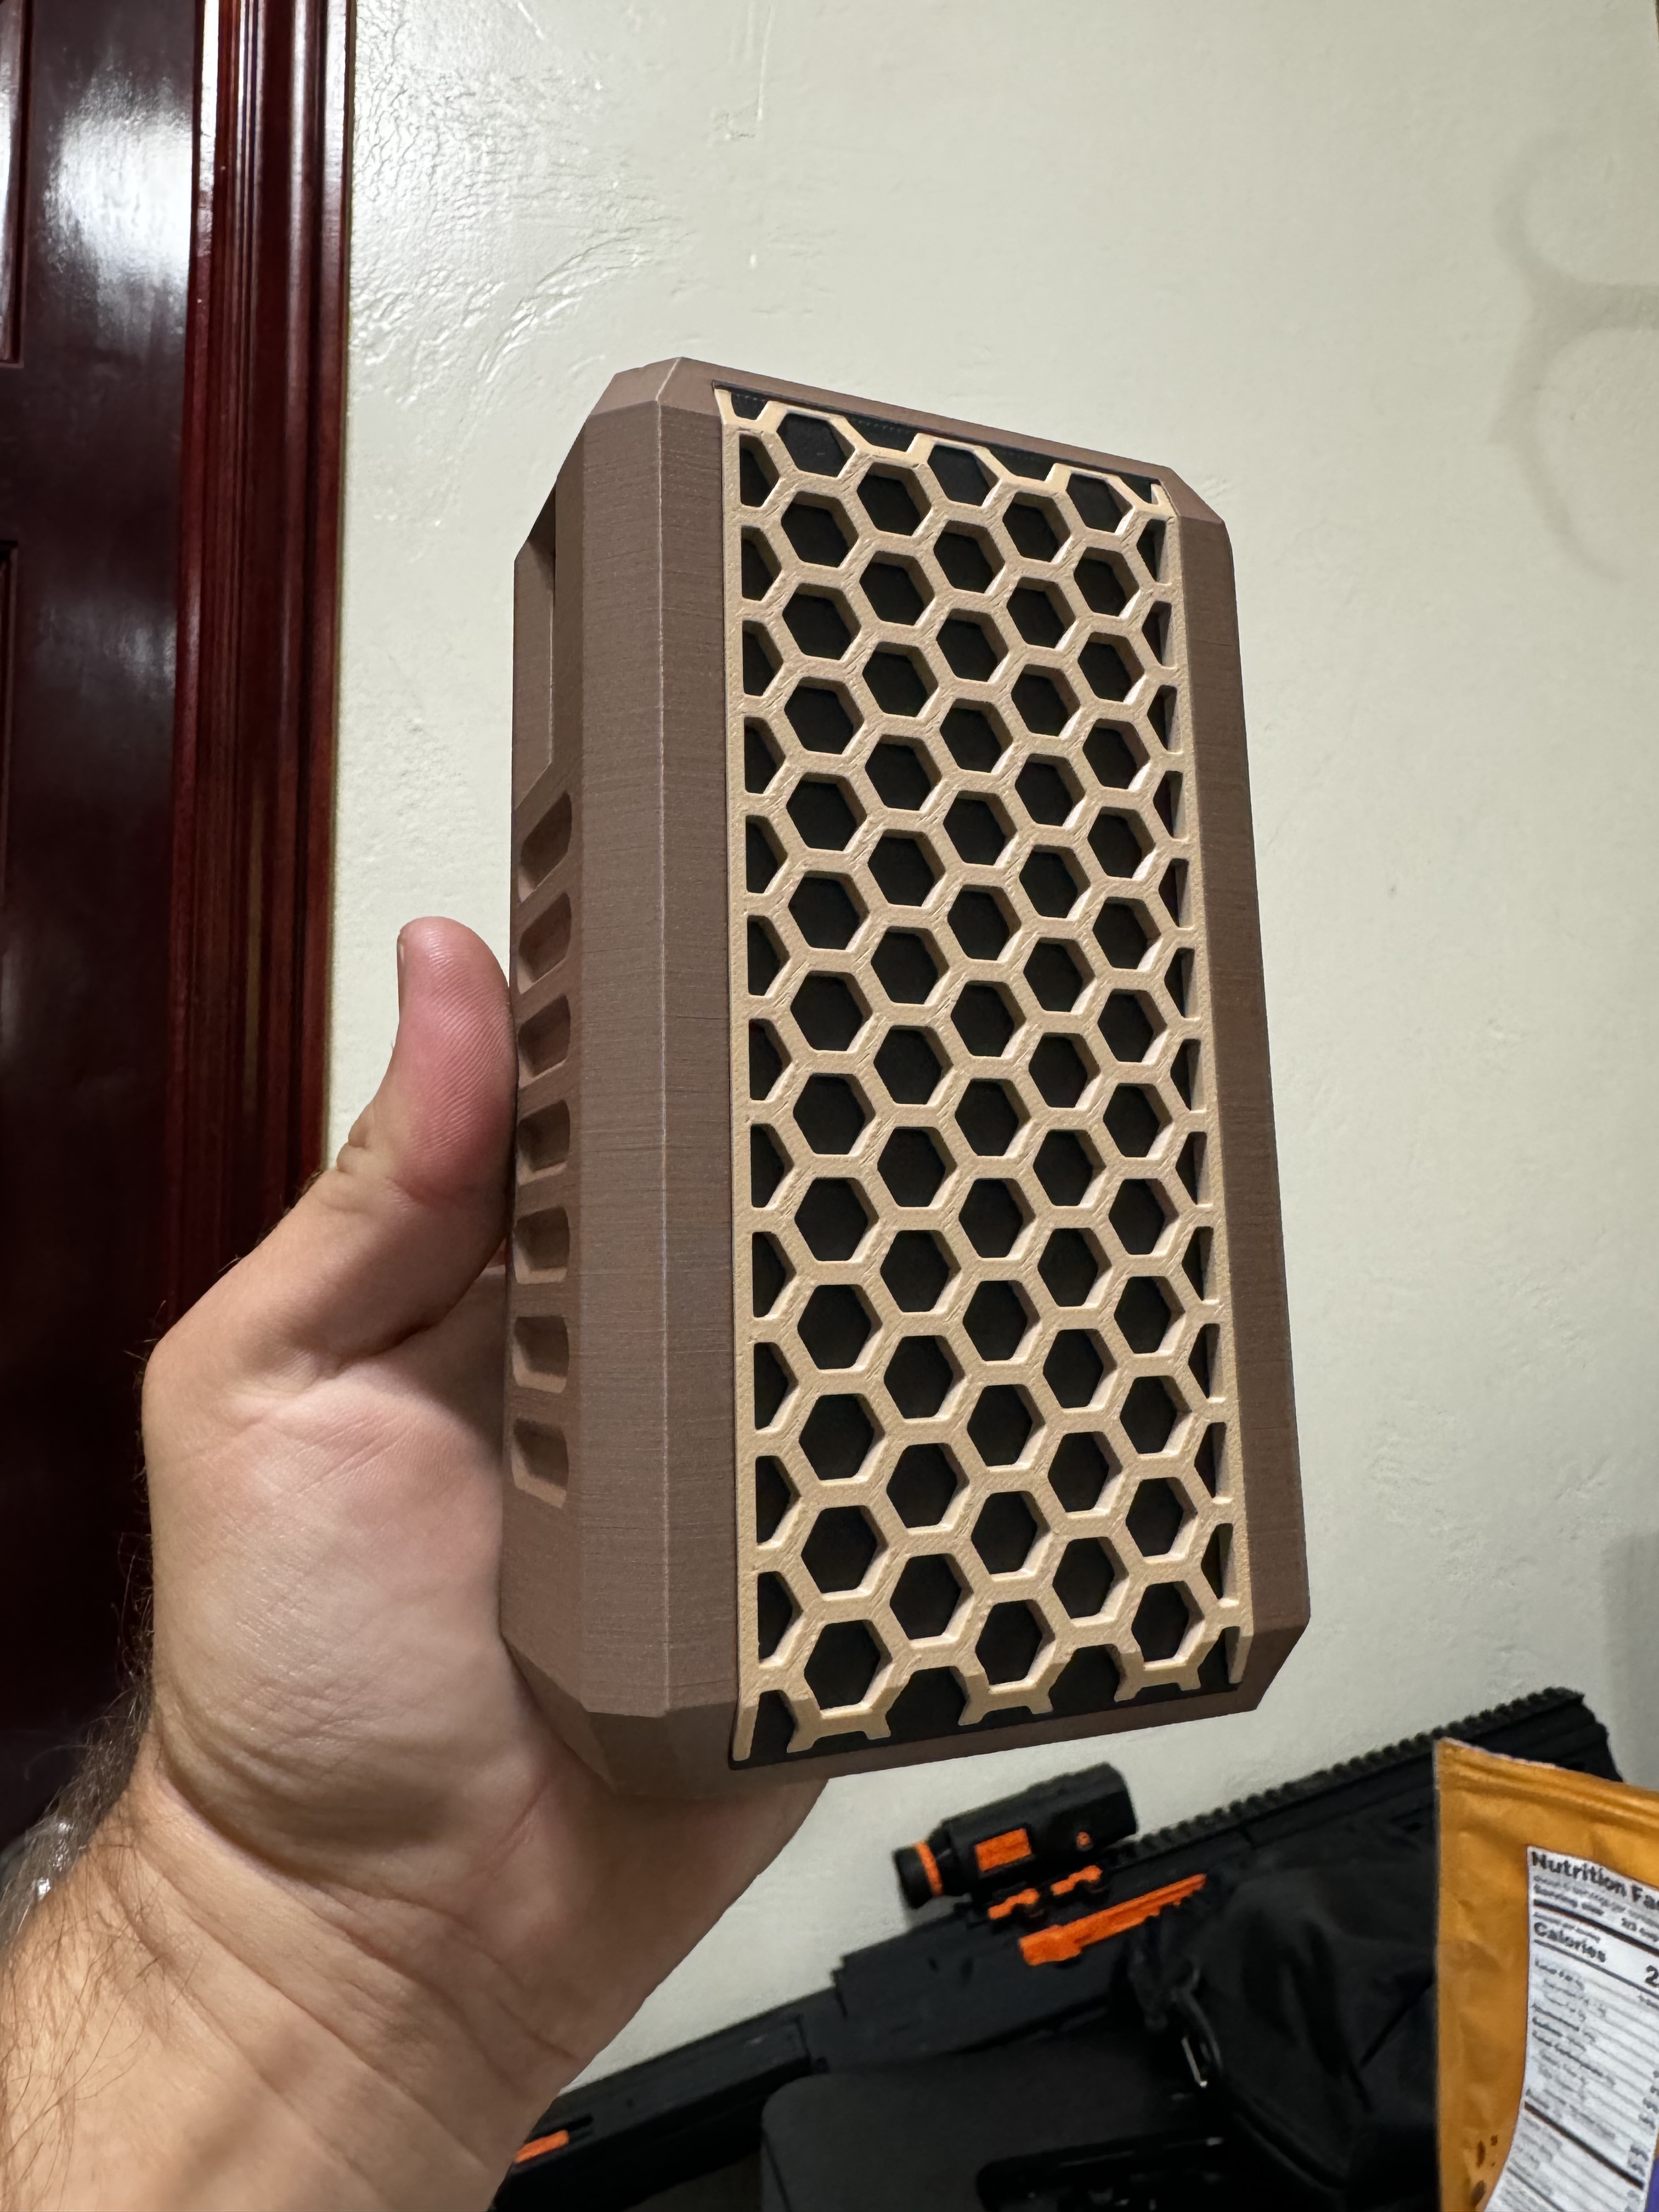
Look out for a new 3d printed case for the Garmin Xero Chronograph coming out from Backfire next week!
I modeled all of these myself. You would be surprised how quick and easy it can be to make custom parts. Really, that’s the beauty of it… just make a custom part specifically for your need. A set of calipers and the knowledge of how to use Fusion360 (it’s the modeling program I use. Free for non-commercial use). There is obviously some learning curve to learning about the printer / slicer / different types of filaments available, but that is becoming easier and easier to learn because it’s so much more user-friendly now.
Wow, you have quite the farm going on! Yeah Bambu Labs makes an amazing printer from what I can tell. I have a prusa mini I bought a few years back. I haven’t ever needed anything bigger than that over the last 4 years.
I am just getting into 3D printing with my youngest son who is 13. He is really interested in it. I had in mind printing a loading block as a first gun related project. We are having a problem though in getting our prints to adhere to the print bed. We have a Creality Ender 3 Pro. I would sure appreciate any suggestions you could offer.
What type of filament are you using? The most common starter filaments are: PLA (pretty much everyone starts with this, as it’s fairly easy to use) and PETG. There are TONS of different filaments and they all have different characteristics. Many of them are troublesome when it comes to bed adhesion (too little adhesion and sometimes too much adhesion)
Does your printer need to be manually leveled, or does it have an automatic leveling system? My machine is automatic but it does the leveling on the software side. - This is a BIG factor when it comes to the print staying put. I HIGHLY suggest getting a printer with automatic leveling because it will be a constant headache otherwise. Again, most modern printers have this already built in.
What type of bed do you have? Some older printers had glass, but most modern ones use a removable metal sheet that has different textures inlayed. If you are using PLA then it should work with a smooth surface just fine. Other filaments prefer a little texture to grab onto.
Does your printer have bed heater? This is something that most modern printers should have. Check on your box of filament it should tell you exactly what the bed temp should be when printing.
Model orientation on your printer bed can be a big factor as well. You need to choose a surface on your model that is flat and has enough surface area for the print to grab to your print surface. Too little surface on the bed and your print can accidentally get knocked off.
Run a first layer print test. You should have a program on your printer that is called something like “First Layer Calibration Test”. You need to run that test as many times as possible before you run your ACTUAL print to make sure you are getting good adhesion. In this test you will be able to fine tune your “Z height” which is how far your nozzle is up from your bed when printing. While the calibration is running you should be able to raise the Z height up and down to get the perfect first layer. This is a really important step.
Adam, thanks for your reply. To answer your questions:
We are using PLA
Our printer has to be manually leveled. Yes, it is a headache, but I am trying to stay on top of it.
We have a glass bed. I wondered about adhesion given how smooth the surface is, but we are using PLA.
Ours does have a bed heater. I will look at the box for our filament.
We intentionally chose models that had large flat surfaces on the bottom. Early we had one print that was hard to remove from the bed, but now we are having issues with the print not adhering.
Thanks for the tip about first layer calibration test. I will look for that.
Okay yeah so that manual bed leveling is may be the bane of your existence. My brother actually got me into 3d printing, and he got an earlier version Creality printer if I remember correctly. I purchased a higher-end printer called a Prusa mini. Long story short is that 3d printing is a chore for my brother because of the constant little nagging things he has to deal with (the big one is him having to constantly level his bed manually), and he hardly ever prints things anymore. I, on the other hand, am constantly designing and printing things because I am rarely dealing with troubleshooting my machine. I like 3d modeling, iterating on design, and printing cool stuff. I don’t like constantly troubleshooting machine issues. I have never once been upset about spending more on my machine because of how reliable it is.
All that being said, if you are interested mainly in 3d printing technology and WANT to fiddle with the machine as much as possible, then going cheap can help you learn things really fast. But if finding yourself constantly fighting the machine, and are interested in getting consistent good parts, then I would encourage you to start saving for a Bamboo Labs, Prusa or another brand that’s really invested in removing the pain of 3d printing from the user experience.
Hopefully you don’t have to deal with that though. Sometimes if you can figure out the little tricks that keep the machine happy, then you will be good to go.
I mostly just typed all of that out for anyone else reading and if they are looking to get into the hobby for the first time.
How heat resistant is it? Some PLA can warp pretty bad in a hot car in the summer. Ask me how I know . There are many PLAs that don’t really have that issue though. They are getting really good at making higher quality filaments now too.
Adam, I kept your 3D printing ideas in mind from when you posted these a year ago. I was amazed at your creations. I have the same powder trickler as you and as of yesterday I have the same A&D powder measuring scale. I have a neighbor who does 3D printing, and I would take you up on the offer to get the files for the Powder Trickler Stand, Powder Trickler Extension Tube, and even the Powder Cup. How does one go about getting the files?
I will get you the files in the next day or two. It’s a good call out to have static safe filament. I didn’t with mine, but probably a good best practice.
If someone wanted to get a “buy once, cry once” 3D printer for things like you have printed, which brand, model, upgrades, filaments, etc would y’all recommend?